To attach a meter to a tank:
- From the Master Menu, select Customer Menu.
- Choose Customer Maintenance.
- On the Customer Maintenance window, select Tank Info.
- On the Tank Information window, choose Set Up Meter/RTM.
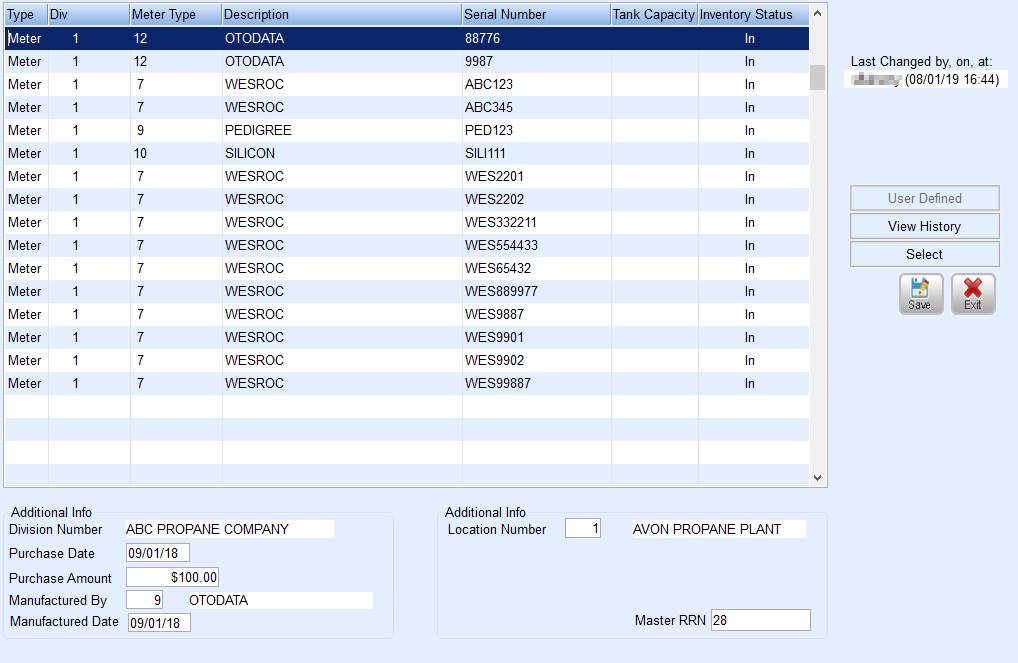
- On the Tank/Meter Maintenance window, select a meter from the list and choose Select. If the meter serial number is not listed, create it by pressing CTRL+C and then enter the required information. Press CTRL+Q to save the record, and select the new meter. Choose Select.
- On the Meter Information window, in the Meter Number field, the system automatically updates with the serial number from the Tank/Meter Maintenance file. If the meter selected had a temporary meter serial number, enter the correct meter serial number.
- In the Cycle Code field, enter the Cycle Code in which the meter will be billed. Alternatively, press F5 or select the Search icon, select the meter Cycle Code from the list, and choose Select.
- In the Billing Date field, enter the date the meter was set for this customer. This field will automatically update with the new billing date each time meter billings are processed.
- In the Last Reading field, if the meter has been used before, enter the actual reading on the meter. If this is a new meter that has never been used, enter 0.
- In the Last Reading Date field, enter the date the meter was installed. This field will automatically update with a new reading date each time meter billings are processed.
- The system automatically updates the Daily Use field with the value entered on the Tank Info screen. If the daily use on the meter is different, enter the number of gallons used daily for non-heating appliances.
- The system automatically updates the K-Factor field with the value entered on the Tank Info screen. If the K-Factor on the meter is different, enter the K-Factor for the meter.
- In the Elev Cd field, enter the code for the elevation at which the meter is located. Alternatively, press F5 and select the Meter Elevation Code from the list. The Meter Elevation Code is used in meter billing to make adjustments based on the altitude. The adjustment factor for the Elevation Code is multiplied by the meter consumption to give a corrected reading.
- In the Installed field, enter the installation date of the meter.
- In the Price Code and Tier fields, enter the Price Code and Tier.
- The system automatically updates the Gallon Billed YTD field when meter billings are processed.
- The system automatically updates the Deposit and Deposit Date fields when a deposit is posted to the customer's account.
- In the Location box, enter the Location to which the meter is tied.
- In the Default Dept field, enter the default sales department for posting meter billing.
- In the RTM/Remote Tank Monitoring field, select which is appropriate if using RTM readings, or Tab to the next field.
- The system automatically updates the Sales YTD field each time meter billings are processed.
- In the Meter Tied to Tank area, the tank in the Tank Information window will display. If the meter is attached to a different tank, press F5 or select the Search icon, choose the correct tank from the list, and then choose Select. The number that displays is not the tank serial number.
- Enter information in the Hold Estimates and Release Date fields only if the meter is on hold.
- In the Update K-Factor field, enter Yes to have the K-Factor in the meter file to change if the tank K-Factor has been changed or No to have the K-Factor not change.
- In the Route field, enter the route for the meter.
- In the Sequence Number area, enter the sequence number for the meter. The meter sequence will be used for scheduling meter readings. Press CTRL+Q.

