SKY Energy is currently only available to Agvance customers.
Energy Force customers should continue to add tanks in Energy Force, not through SKY Energy at this time.
A listing of all Tanks is available in Agvance SKY Energy. The list can be narrowed down by selecting the Filter icon and entering a filter criteria or search by ID, Name, Address, or City and State in the Search Customers bar located in the header. When typing, the grid will populate based on the text entered. Choose the Ellipsis at the top to Reset Grid from filtering or Autofit Columns. Empty fields displayed on the Tank grid will be displayed as a double dash (--) rather than empty.
Note: For larger tank lists, initial view of the Tanks page will load the first 500 tanks by default, allowing users to see data right away in the grid.
Searching will search the entire database of Tanks for larger Tank lists. However, filtering and sorting the grid will only filter and sort the grid data which may not be the entire database of Tanks. For example, the initial load instance would filter and sort the 500 tanks only until a search is conducted to further refine the results. The Search bar at the top searches across all grid inputs.
For more information on how to use the Tank grid see, Using Grids in Agvance SKY.
Selecting a Customer name opens the Overview page. To view more Customer details, select the Customer name link on the Tanks tab to open that specific Customer’s Agvance SKY Customer Overview page.

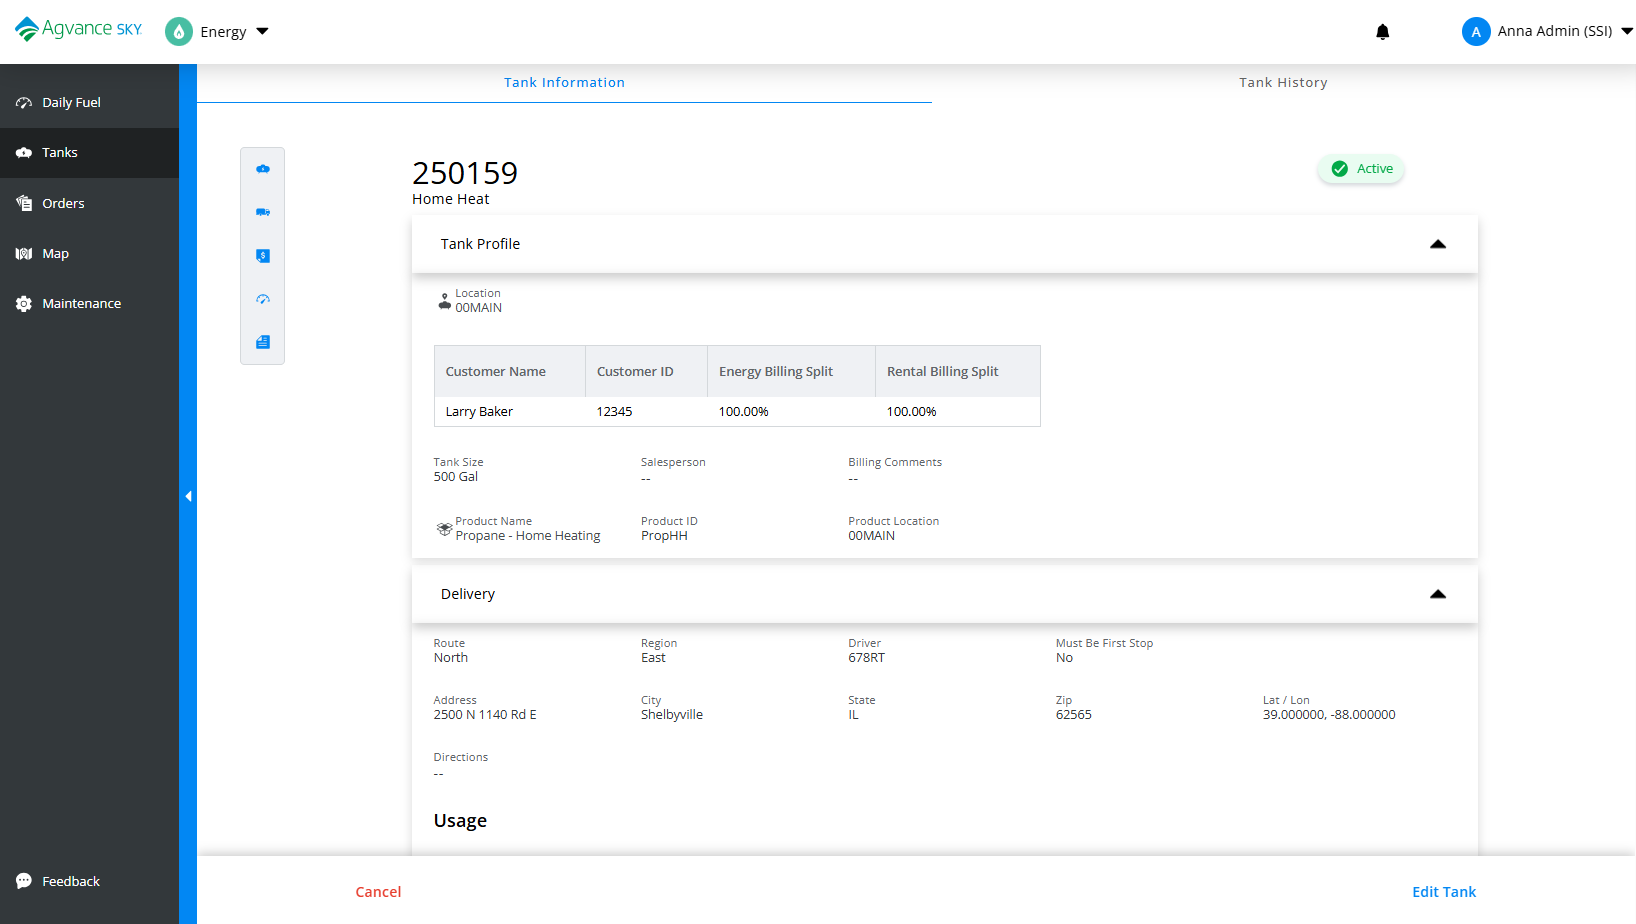
- Tank Serial Number – Selecting a Tank’s Serial Number from the Tank grid will redirect to a detailed Tank Information page for that specific Tank.
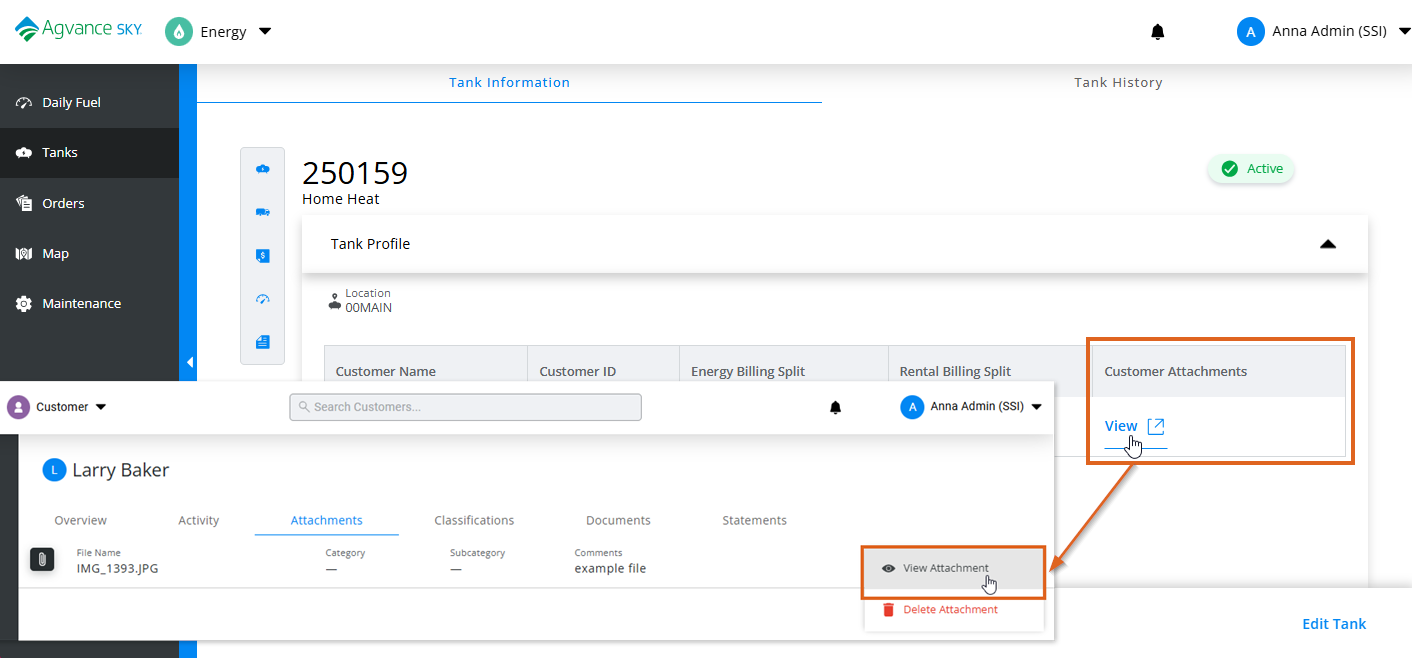
- Customer Attachments – Select View under Customer Attachments to navigate to SKY Customer Attachments tab. Then select the Ellipsis and choose View Attachment. If no attachments are available the View link on the Tank Information page will be disabled.
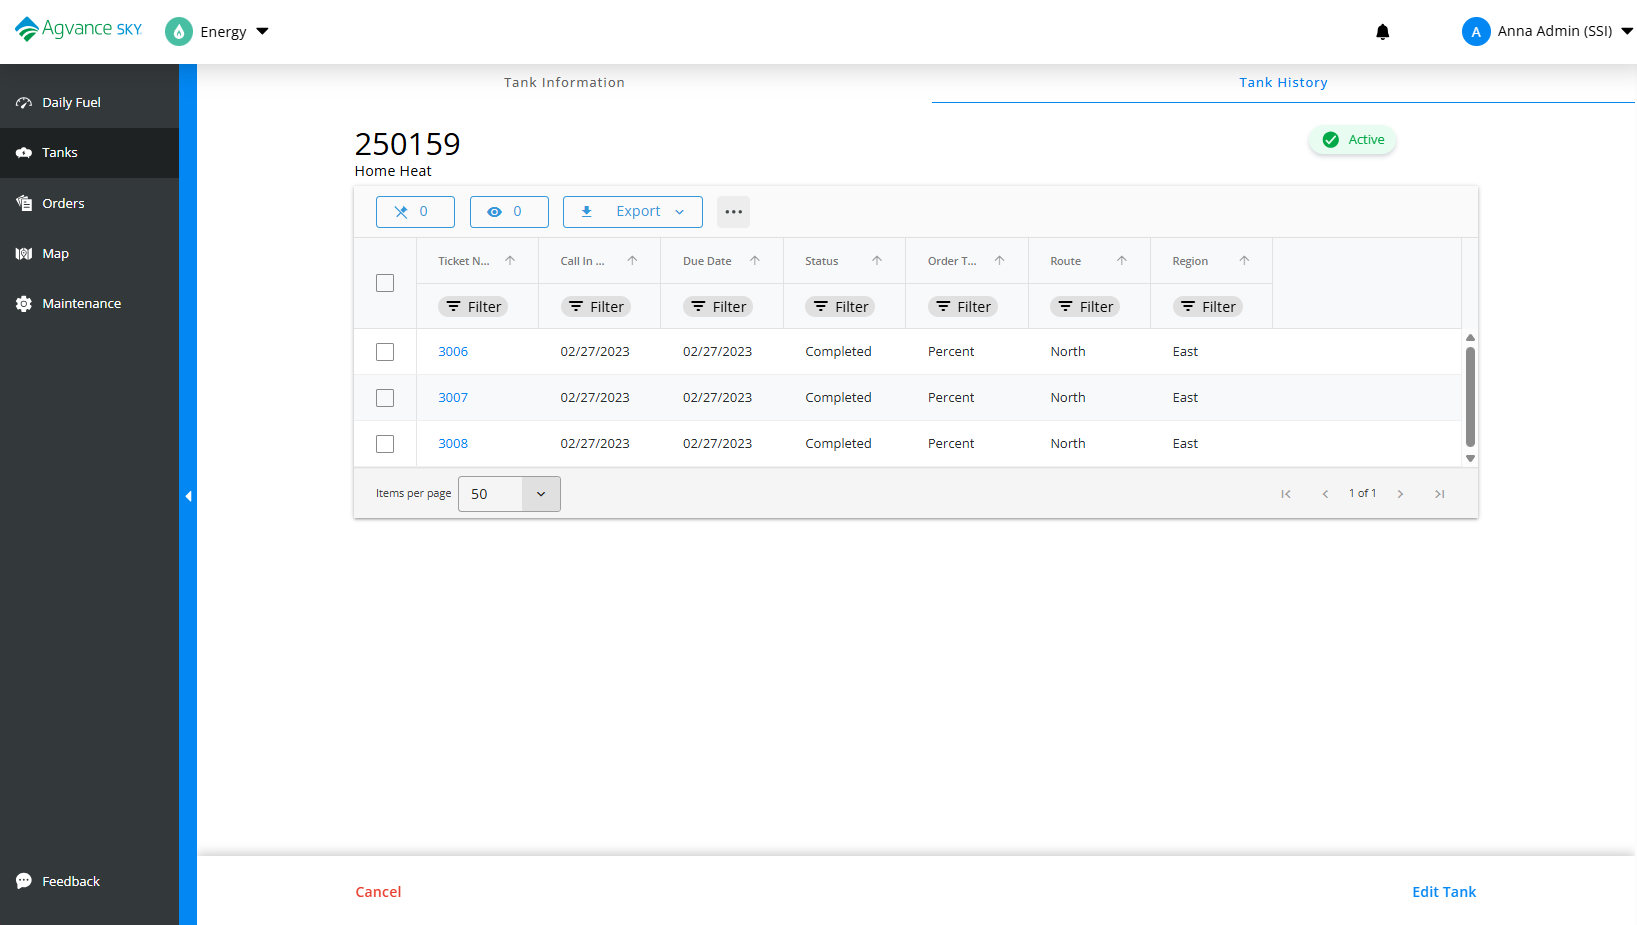
- Optionally select the Tank History tab at the top of the Tank Information page to view that particular Tank’s Product Delivery Order history including the Ticket Number, Call In Date, Due Date, Status, Order Type, Route detail and Region. The most recent 10 will load initially with the option to view more and filter down within the grid.
- Customer Attachments – Select View under Customer Attachments to navigate to SKY Customer Attachments tab. Then select the Ellipsis and choose View Attachment. If no attachments are available the View link on the Tank Information page will be disabled.
- Calculated by – Displays what the Estimated Left (%) is being calculated by.
- Monitor – Displays when a monitor reading for the tank within the last five days is available.
- K-Factor – Displays when no reading within the last five days and the Update k-Factor option is on for the tank.
- If not calculated by either, the grid will display a double dash (--).
- Last Read – Displays the last monitor read date for that tank.
- If there is no monitor associated with the tank or if no read date is available, a double dash displays.
- Estimated Left (%) – If a Tank has a reading within the last 5 days, a percentage bar will show along with percentage amount.
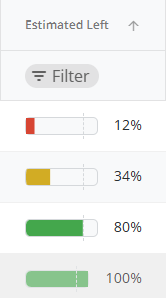
- Very low/Critical, under 25%, will be seen as red.
- Low levels but not yet critical, 26% - 50% will be seen as yellow.
- Normal levels, 51% - 100%, will be green.
- If a Tank does not have a tank reading within the last five days, the cell will display a double dash (--) or empty.
Note: The dotted line on the 80% level is to give a better reference based on propane fill % standards.
- Delivery Type – Displays the Delivery Type associated with the Tank. This could be Calendar Days, Scheduled Delivery, or Will Call.
- Weather – Selecting the Weather icon displays the local weather for that specific Tank.

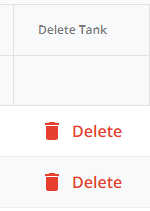
- Delete Tank – Delete a Tank with validation prompts confirming the deletion. The User permission must be enabled in Agvance SKY Admin to delete Tanks.