Scheduling
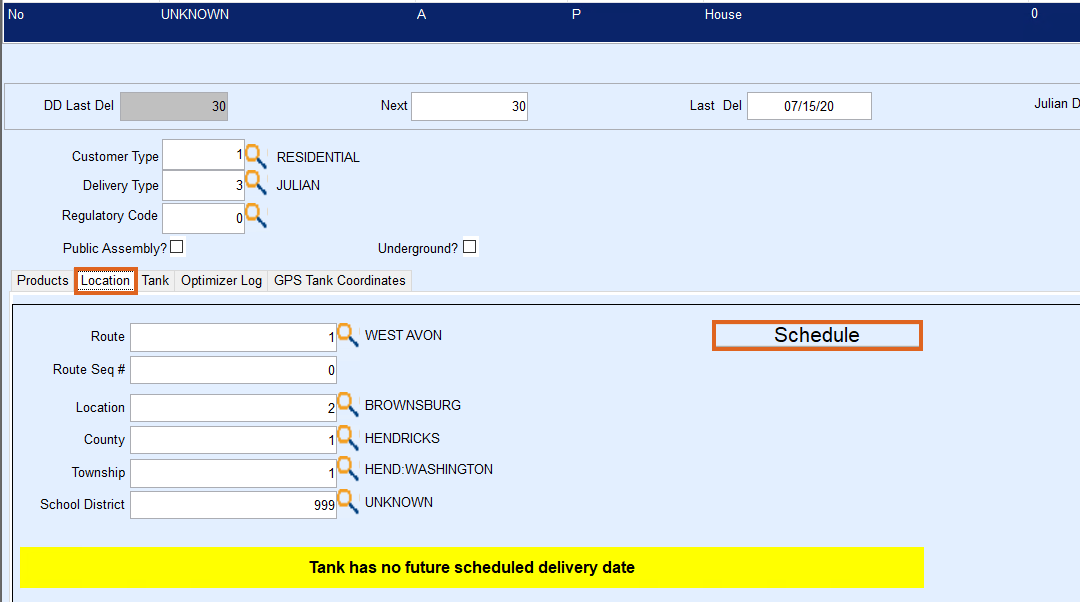
- Select the tank in the upper section of the Tank Info screen and choose the Location tab.
- Select the Schedule button.
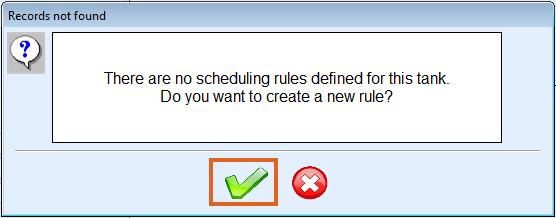
- Choose the Green Checkmark to create a new scheduling rule.
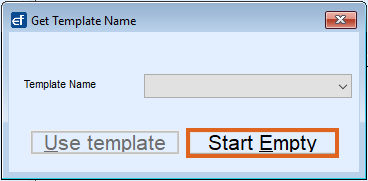
- Select Start Empty on the Get Template Name window. This will navigate to the Define Scheduling Rule screen.
- See Julian Delivery Schedules for setting up a schedule template.


Weekly
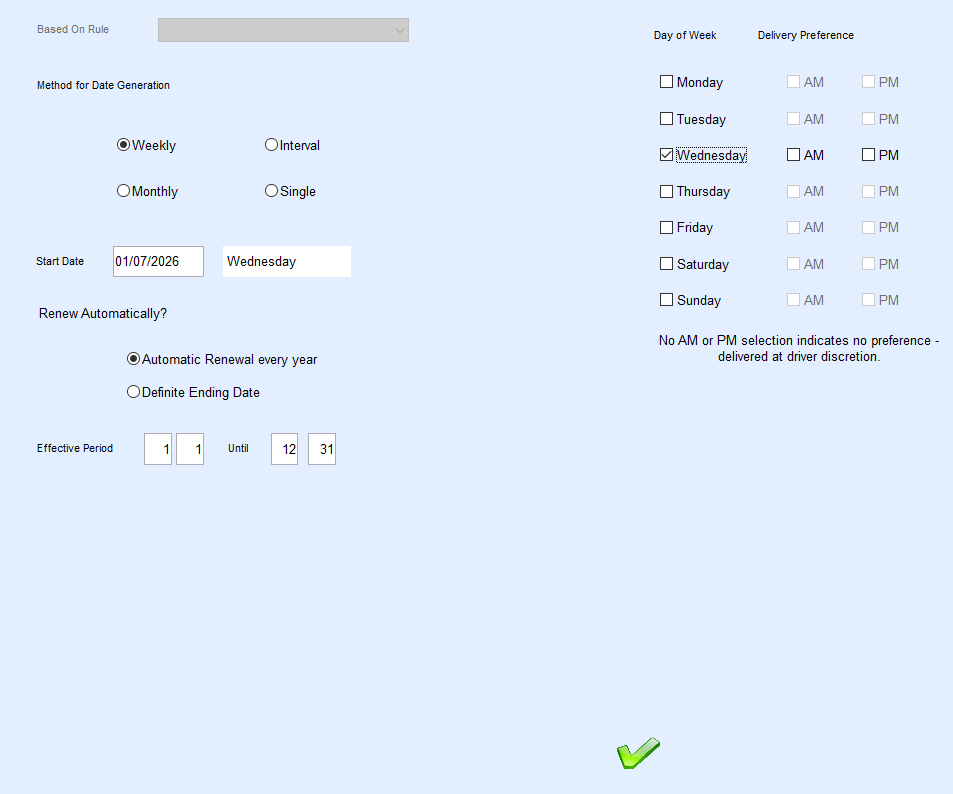
- Choose Weekly as the Method for Date Generation.
- Enter a Start Date for the schedule.
- The Start Date must be greater than today’s date.
- Select the Renew Automatically? preference.
- Automatic Renewal will regenerate the schedules after the Effective Period has been met.
- Definite Ending Date is used for schedules that should not regenerate. This is typically used for a temporary scheduling period.
- If Automatic Renewal is chosen, enter the Effective Period.
- If left as 1 1 and 12 31, this is an indication to run the schedule throughout the year.
- If set to 6 1 and 12 31, the schedule is effective from June to December.
- Select the Day of Week for delivery. This can be a single day or multiple.
- Select the Green Checkmark to confirm settings and generate a schedule.
The generated schedule will display all of the scheduled dates for the Effective Period and will automatically renew each year if Automatic Renewal was selected. Choose Exit when finished.
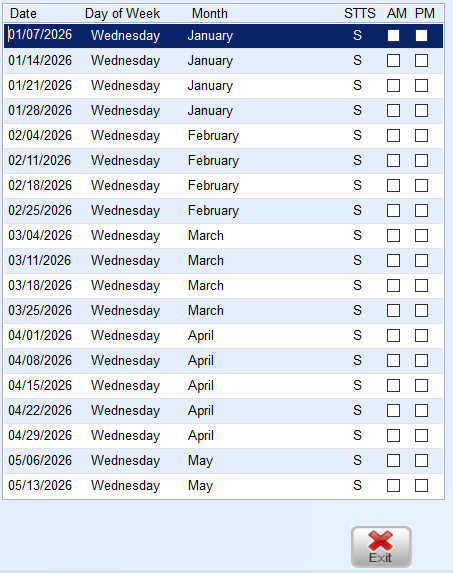
The Julian Delivery Date field will update on the Tank Info screen.

Monthly
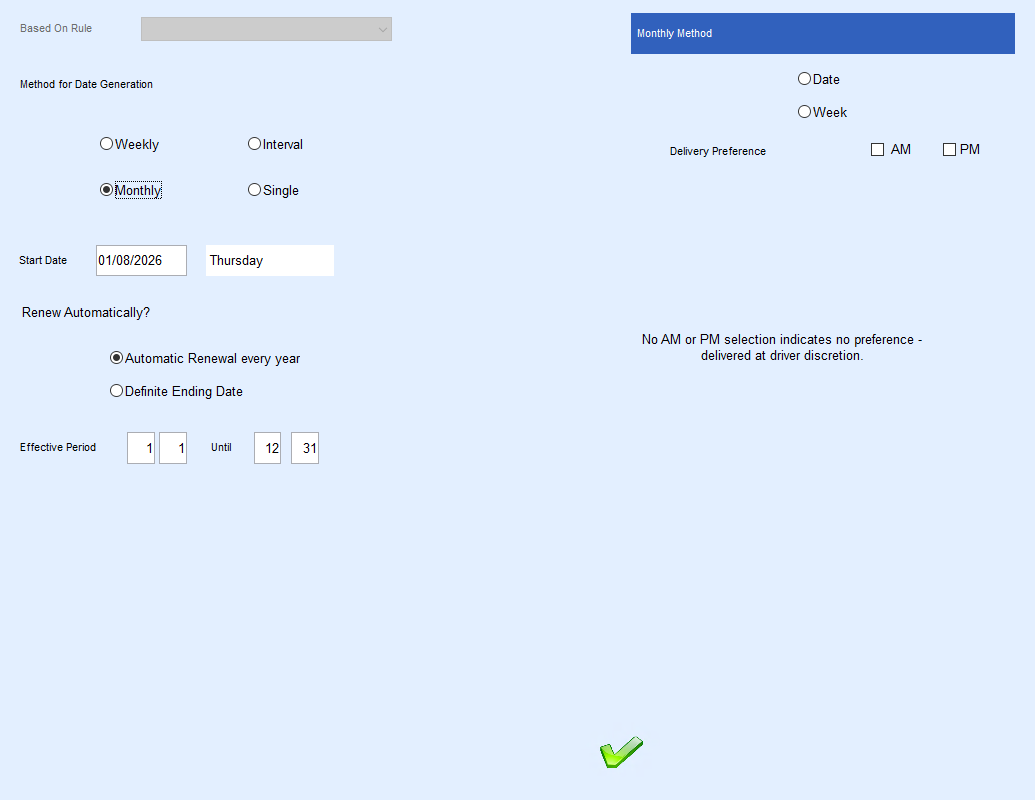
- Choose Monthly as the Method for Date Generation.
- Enter a Start Date for the schedule.
- The Start Date must be greater than today’s date.
- Select the Renew Automatically? preference.
- Automatic Renewal will regenerate the schedules after the Effective Period has been met.
- Definite Ending Date is used for schedules that should not regenerate. This is typically used for a temporary scheduling period.
- If Automatic Renewal is chosen, enter the Effective Period.
- If left as 1 1 and 12 31, this is an indication to run the schedule throughout the year.
- If set to 6 1 and 12 31, the schedule is effective from June to December.
- Select the Monthly Method.
- Date – Indicate a specific Day of Month.
- Week – Indicate if the delivery should be made on a specific day of every X number of weeks.
- Select the Green Checkmark to confirm settings and generate a schedule.
The generated schedule will display all of the scheduled dates for the Effective Period and will automatically renew each year if Automatic Renewal was selected. Select Exit when finished.
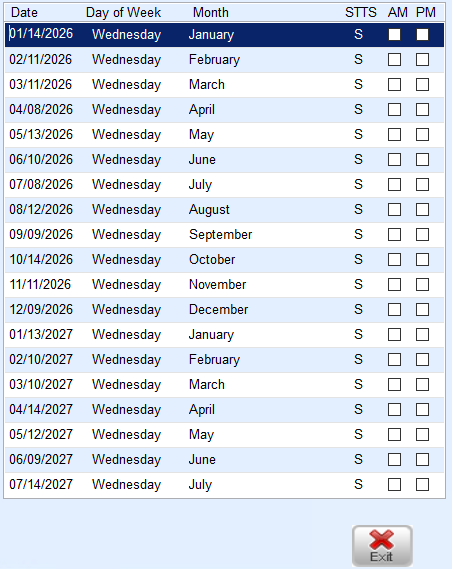
The Julian Delivery Date field will update on the Tank Info screen.

Interval
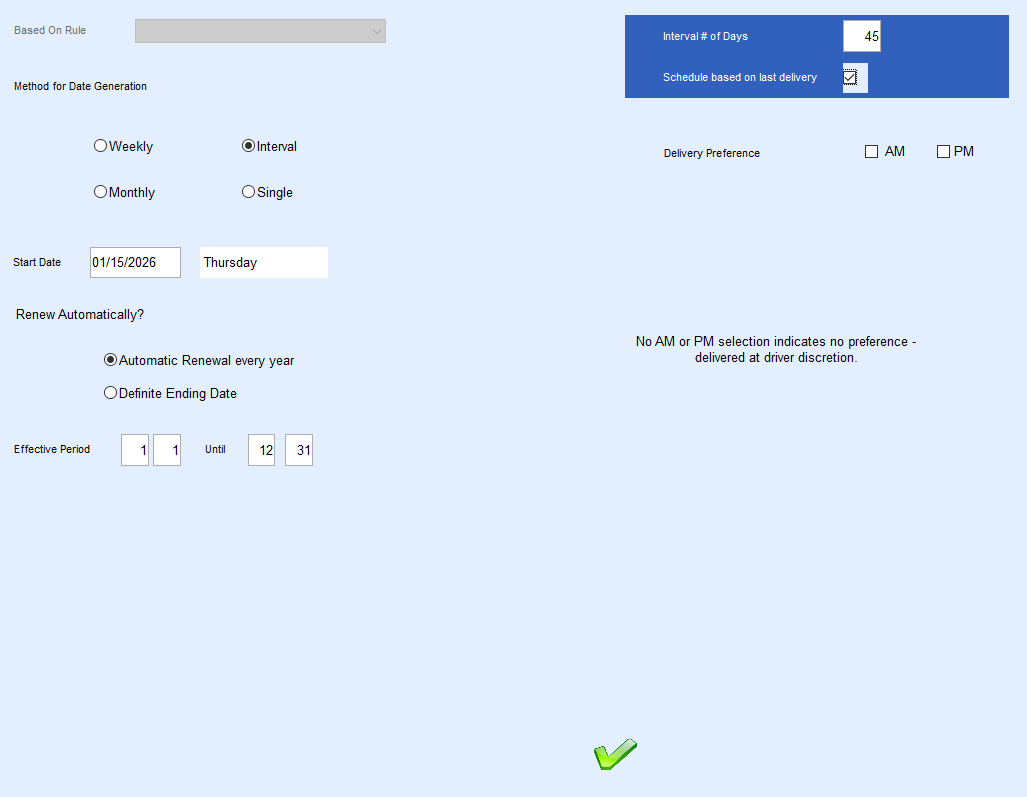
- Choose Interval as the Method for Date Generation.
- Enter a Start Date for the schedule.
- The Start Date must be greater than today’s date.
- Select the Renew Automatically? preference.
- Automatic Renewal will regenerate the schedules after the Effective Period has been met.
- Definite Ending Date is used for schedules that should not regenerate. This is typically used for a temporary scheduling period.
- If Automatic Renewal is chosen, enter the Effective Period.
- If left as 1 1 and 12 31, this is an indication to run the schedule throughout the year.
- If set to 6 1 and 12 31, the schedule is effective from June to December.
- Enter the Interval # of Days.
- Select Schedule based on last delivery if the schedule should generate based off the last delivery date. Leave unchecked if it should schedule every X number of days regardless of the last delivery date.
- Select the Green Checkmark to confirm settings and generate a schedule.
The generated schedule will display all of the scheduled dates for the Effective Period. If Schedule Based on last delivery is chosen, it will only display the next scheduled delivery date.
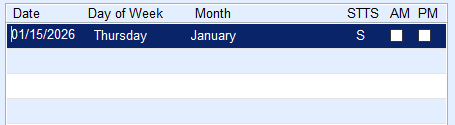
The Julian Delivery Date field will update in the Tank Info screen.

Single
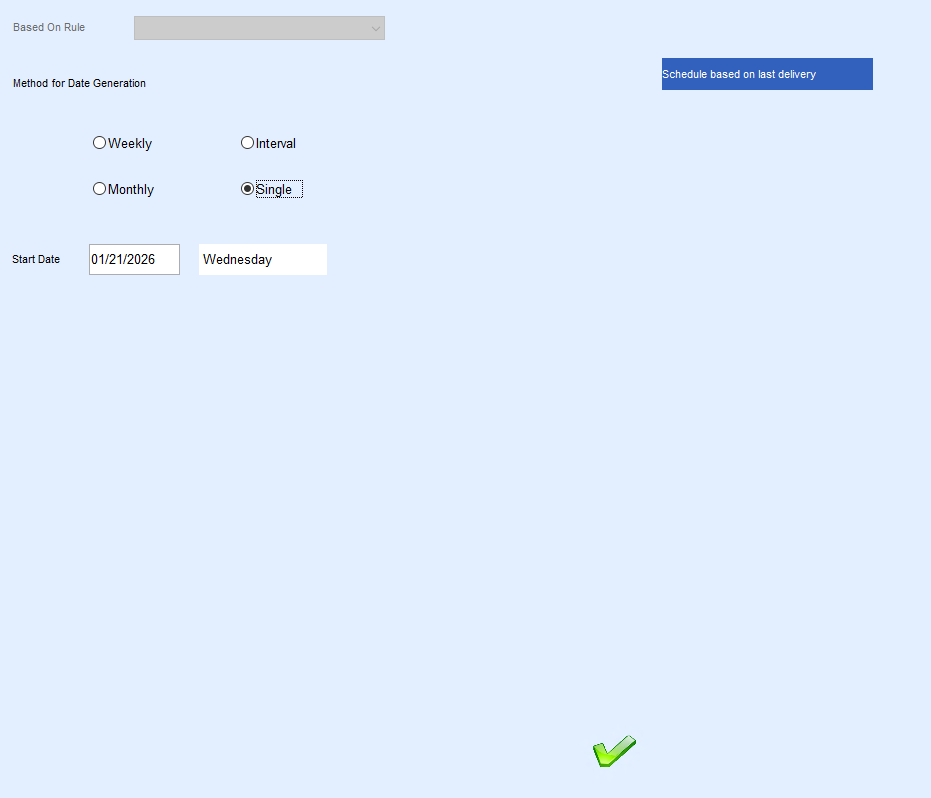
- Choose Single as the Method for Date Generation.
- Enter a Start Date (Delivery Date) for the one-time delivery.
- Select the Green Checkmark to confirm settings and generate a schedule.
- The Delivery Schedule window will update on the Tank Info screen.