When selecting a Delivery Type of SD for Scheduled Delivery, the Tank Info screen will automatically display a Schedule button to set up a Schedule for this customer.

- Select Schedule located on the Location tab of the Tank file.
- Choose Start Empty in the Get Template Name window. This will navigate to the Define Scheduling Rule screen.

- Select the Method for Date Generation.
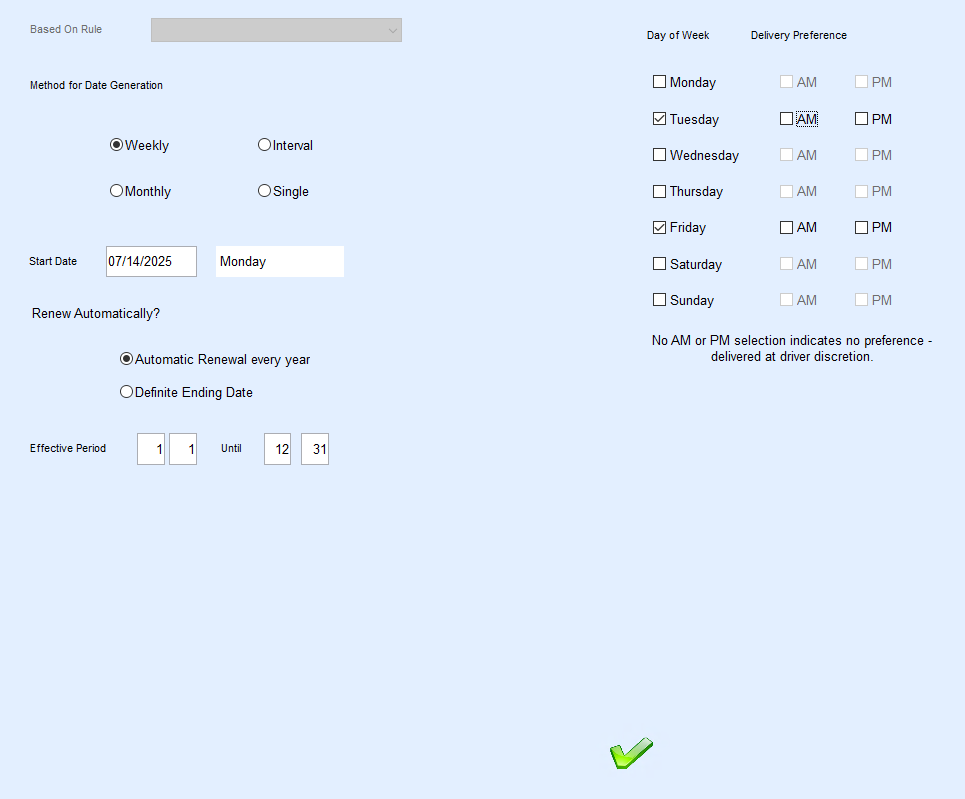
- Weekly – This indicates a delivery on a specific day(s) of the week.
- Monthly – This indicates a delivery made once per month by Date or by Week (every 1st, 2nd, 3rd, or 4th week of the month) and what day.
- Interval – This indicates a delivery by a certain number of days.
- Single – This indicates a one-time delivery.
- If Weekly, select the Day(s) of Week to deliver to the tank. Proceed to Step 8.
- If Monthly, select Date or Week. Proceed to Step 8.
- If Interval, enter the number of days between delivery. Proceed to Step 8.
- If Single, select Single and proceed to step 8.
- Enter the Start Date of the Schedule.
- Select Automatic Renewal every year or Define Ending Date in the Renew Automatically? section.
- Enter the Effective Period.
- Select OK when finished. This will navigate to the Scheduling Rules screen and display the scheduled dates for delivery.
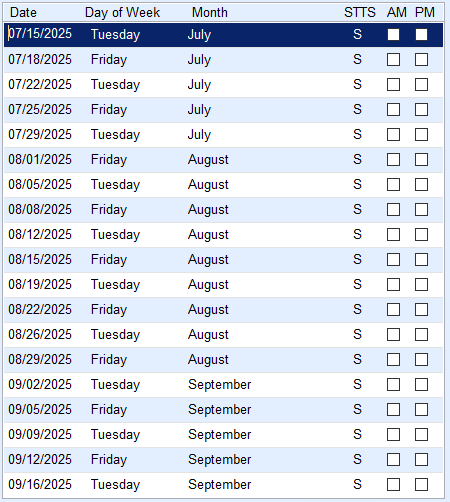


The date of delivery is indicated along with a STTS (Status code). The status code displays S for scheduled until it is delivered. Once delivered, the code will change to a D. If the delivery is skipped, the code will change to a K.
Once the schedule is created, the tank screen will display a Julian Delivery date as an indicator of when the next delivery is due. The date automatically updates as deliveries are made.

If for some reason a schedule needs to be edited, select the schedule on the Scheduling Rules screen, make the appropriate changes, and select OK. Upon returning to the Rules screen, select Populate and it will generate a new schedule.
