The system is designed so that it will automatically set the Service Order status to Completed once the Cleared entry has been made with regard to the Technicians tab on the SO. The system will also set the Closed Reason code.
SSI will assist in assigning the proper codes during the initial setup phase.
In the event that the Status or Closed Reason codes need to be modified or an invoice completed, do the following:
- Select the Service Order and choose Modify.
- In the Status field of the Service Order, press F5 and change the status to Closed.
- Select the Service Order tab located in the bottom half of the screen.
- Enter the Closed Date. Manually enter this information or double-click in the field and select the date from the calendar.
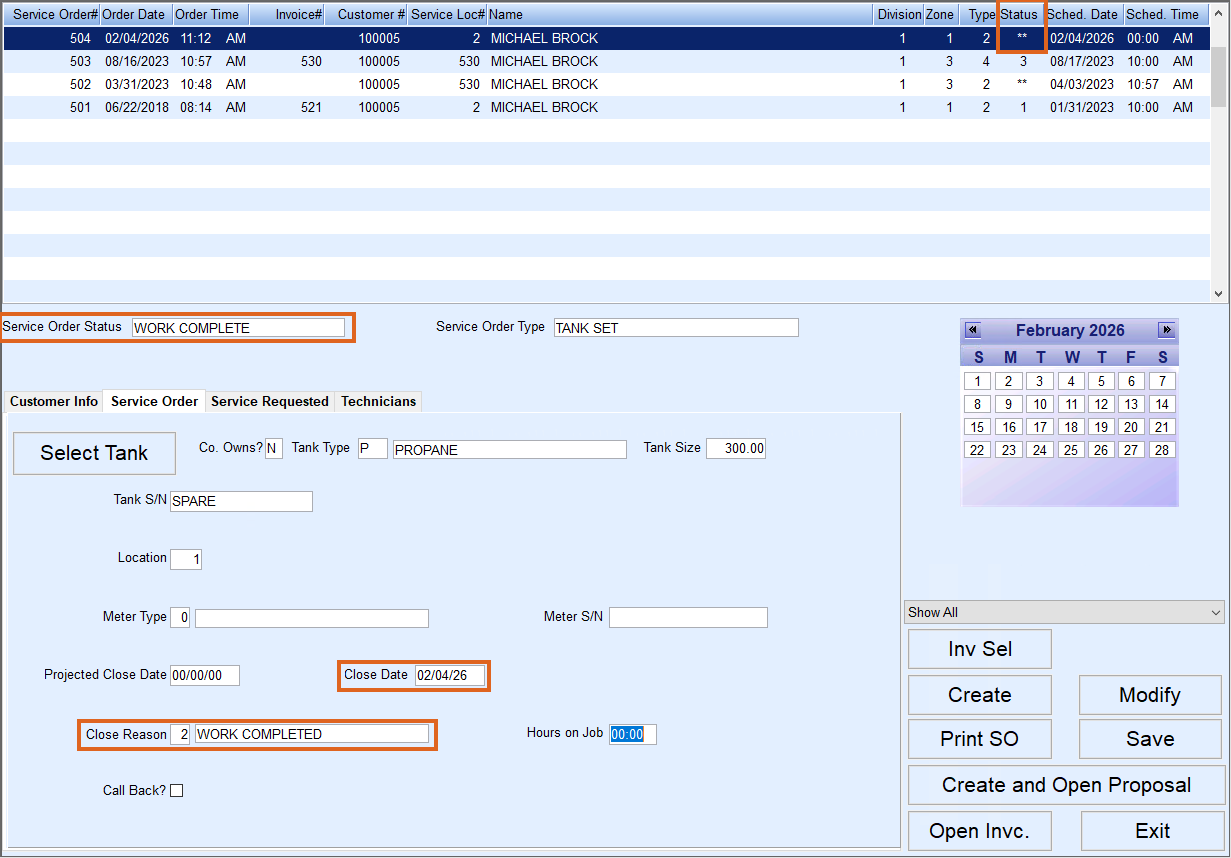
- Press F5 in the Closed Reason field and select the appropriate status.
- Enter the number of Hours on Job if applicable.
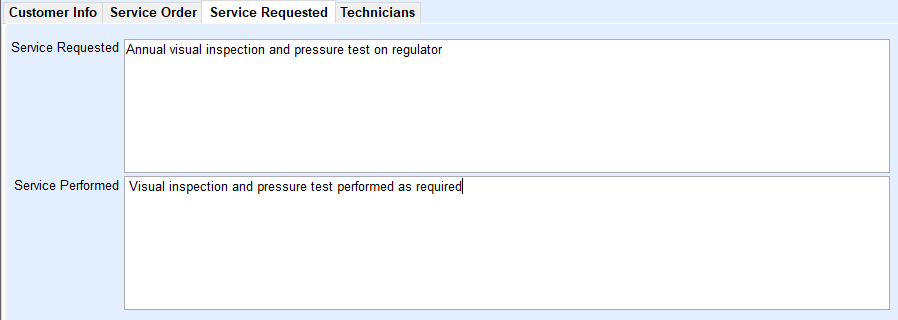
- Select the Service Requested tab and enter the Service Performed if desired.
- Select Save when finished. The service order is now closed.
- On the Technicians tab, verify that Arrived, Enroute, and Cleared times have been completed.
- Select Save.
- If an invoice is required for the customer, select Open Invc.
- Select Create New Invoice.
- The Service Order Type will populate automatically.
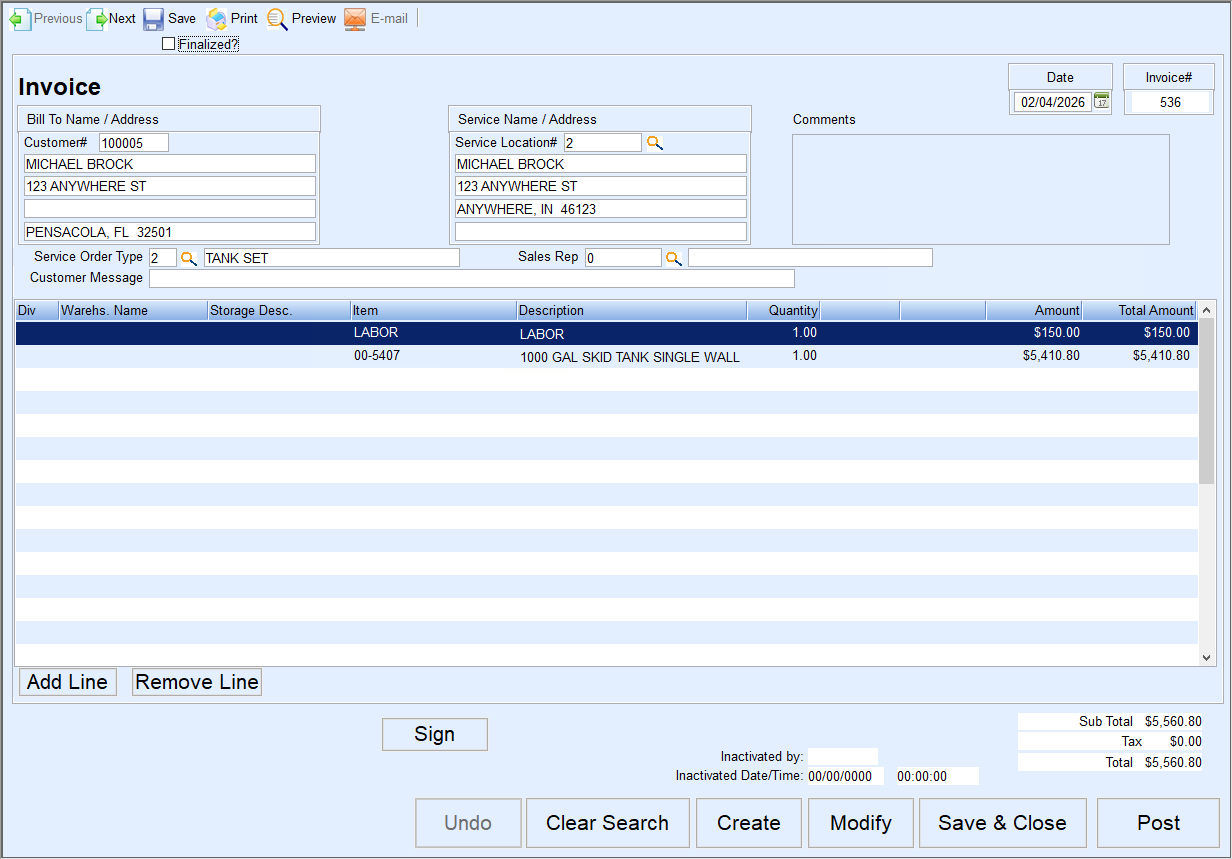
- Select the Sales Rep.
- Optionally enter a Customer Message. This message will print on the customer invoice.
- Enter the Item number manually or press F5 to choose from the list.
- All Inventory items assigned to the warehouses will display. Search for an item using the Search For field. Search by Description, Item, Dept#, or Category.
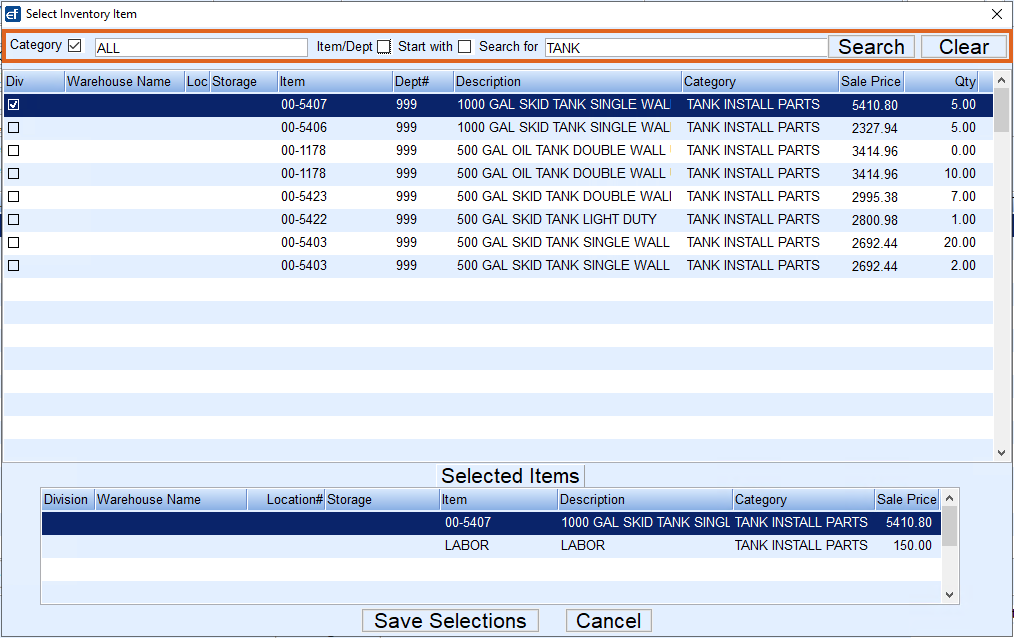
- Select each line item to be invoiced and choose Save Selections. This will return to the invoice.
- Enter the quantity of items being invoiced and press Tab. This will automatically calculate the total amount for the line item.
- To add another line item, press the Down Arrow on the keyboard to create a new line or select Add Line on the Invoice screen. Press F5 to display the items and then enter the quantity once selected.
- Once all items have been entered and the invoice verified, select Save and Close if there are other items to be added or Post to finalize the invoice and create a Sales Journal.
- If Post is chosen, indicate how many copies to print.
- The Invoice will print and the line items listed will post to the Customer History and posting journals. Additionally, the Service Order screen will now reflect an invoice number on the Service Order line.


