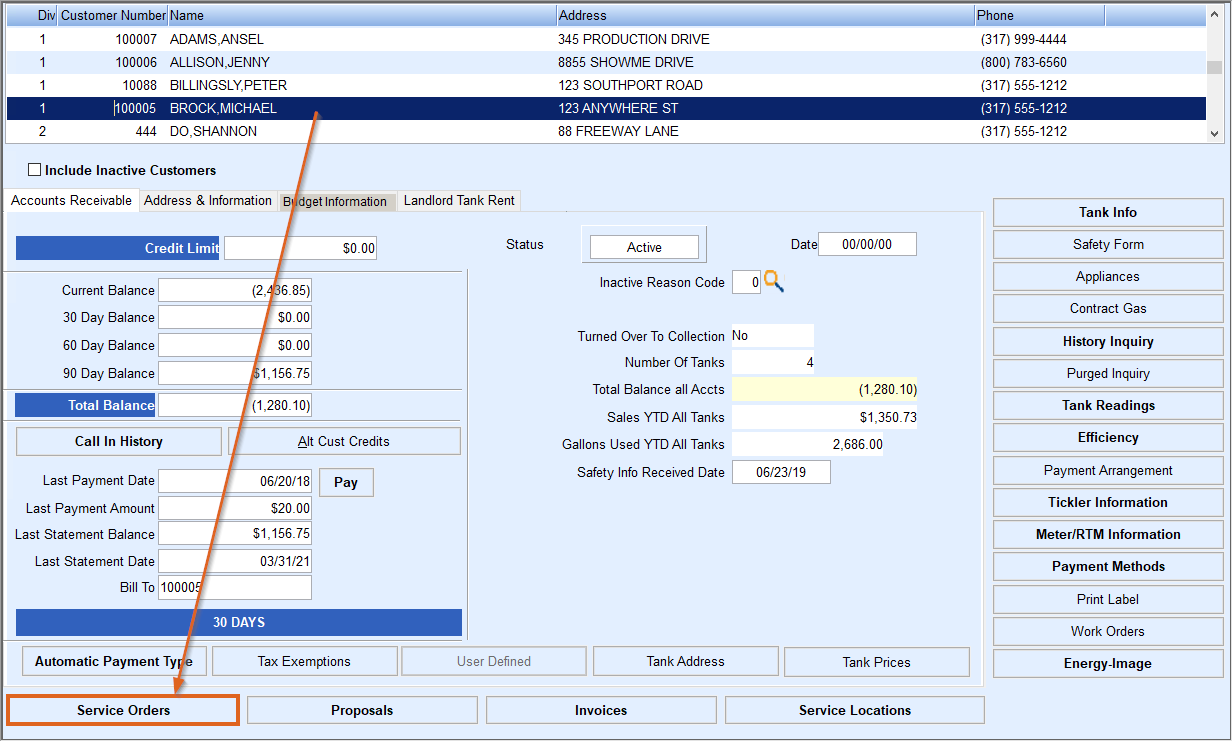
- Navigate to Main Menu / Customer Menu / Customer Maintenance.
- Select the customer who requested service and choose Service Orders.
- Choose Create located on the menu on the right side of the screen.
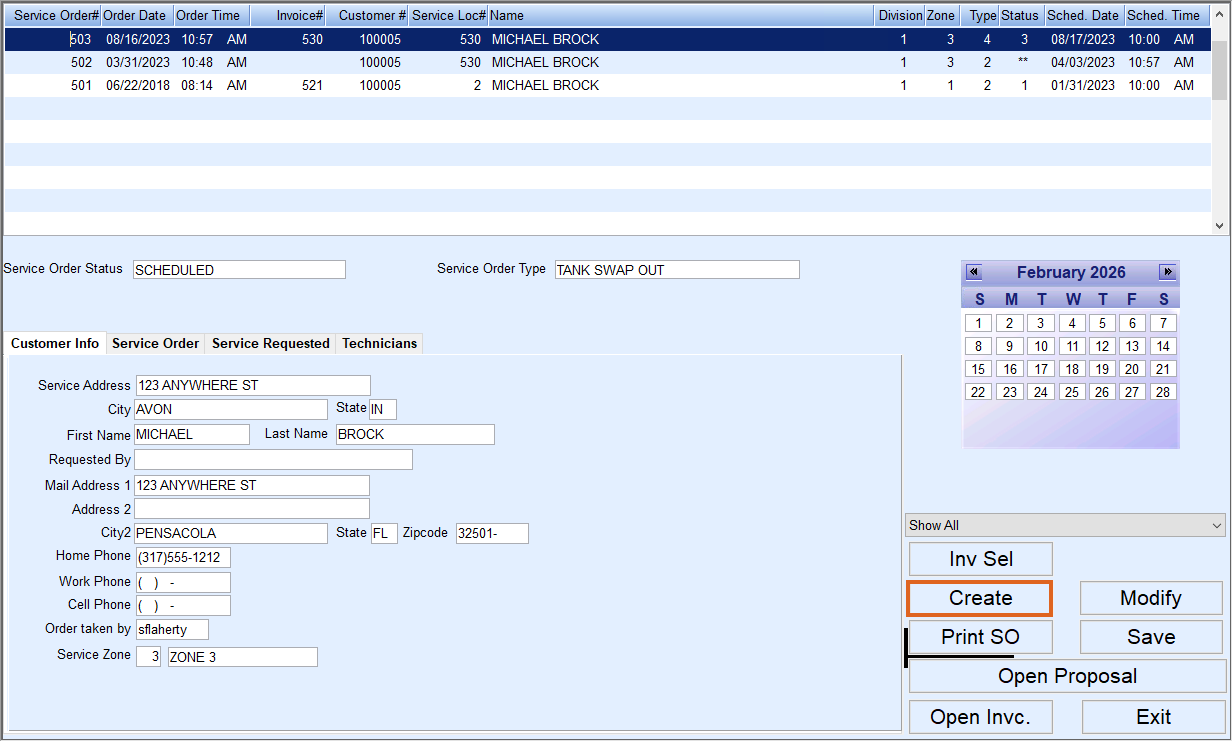
- The Service Order# automatically generates and the Order Date populates to the current date. The Order Time and Customer # automatically populate as well. The Order Date and Order Time fields can be modified if necessary.
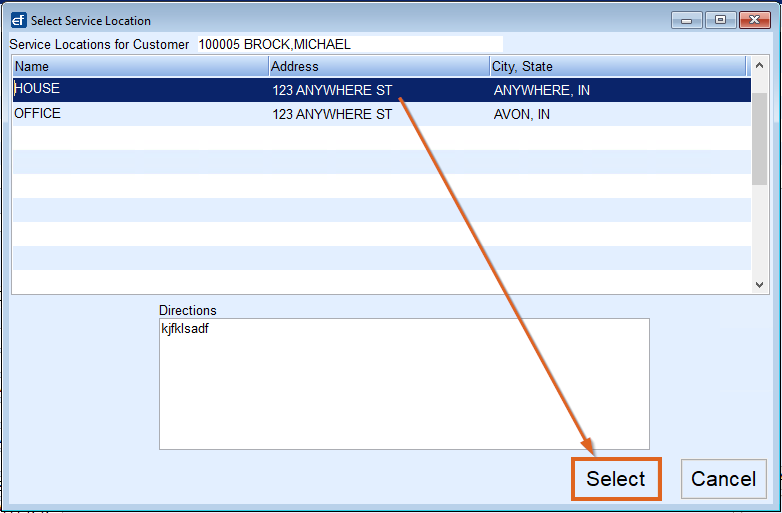
- In the Service Location# field press F5 and select the location from the list.
- The Division and Zone fields will automatically populate based on the Service Location chosen.
- Press F5 in the Type field and select the type of work to be performed.
- Press F5 in the Status field and select the current status (scheduled, pending, etc.).
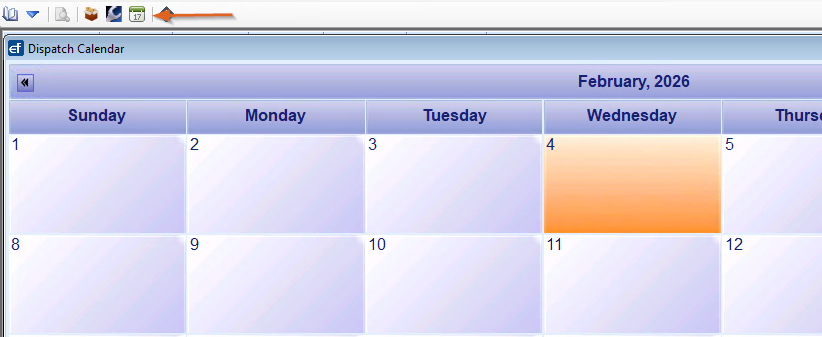
- Enter service Scheduled Date. Input the date manually or double-click in the Scheduled Date field to display the Dispatch calendar.
- The calendar will display the number of items scheduled for a particular date. To insert the date from the calendar, double-click on the date and it will insert into the Scheduled Date field.
- If uncertain of the date, leave it blank and modify later.
- The Dispatch calendar can be viewed at any time by selecting the Calendar icon at the top of the Energy Force menu or by pressing Alt+D.
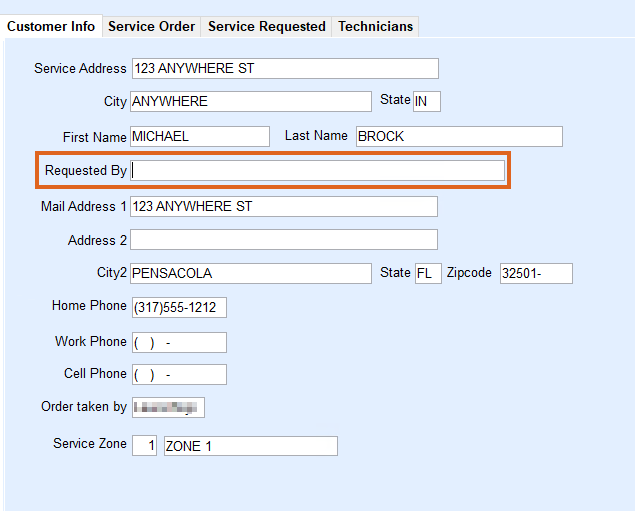
- In the Requested By field located on the Customer Info tab, enter who requested the Service Order. The Service Address and other information can be modified as necessary.
- Select the Service Order tab.
- If the work to be performed is on an existing tank, choose Select Tank.
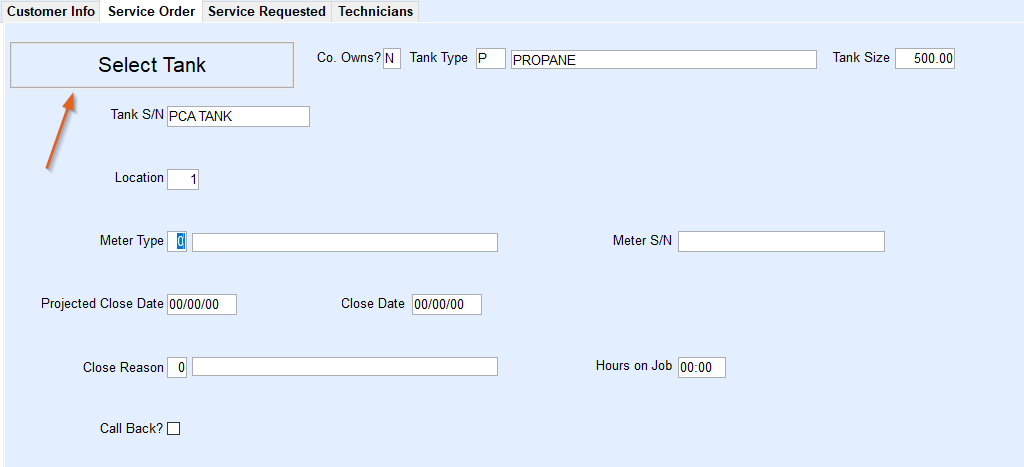
- If Co. Owns? is set to No, input the information manually.
- If servicing a Meter, enter the Meter information.
- Optionally enter a Projected Close Date.
- The Close Date, Close Reason, and Hours on Job will be entered once the job has been completed.
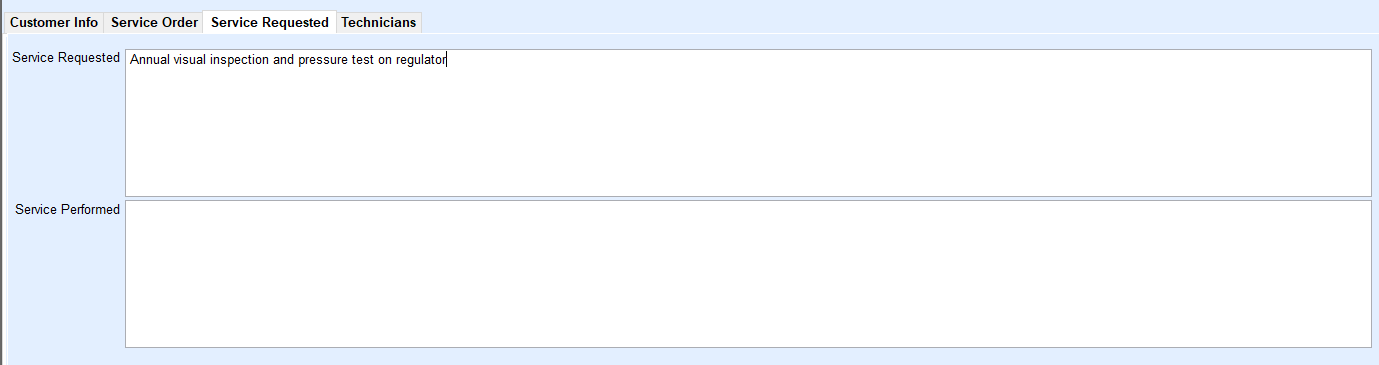
- Select the Service Requested tab.
- Enter the Service Requested and any special instructions for the technician as necessary.
- Select the Technicians tab. Assigning a Technician or Technicians to a job can be accomplished in a number of different methods.
- In the Technician Seq field, press F5 and select the Technician to assign to the job. If more than one Technician is assigned to the job, arrow down and press F5 to select again.
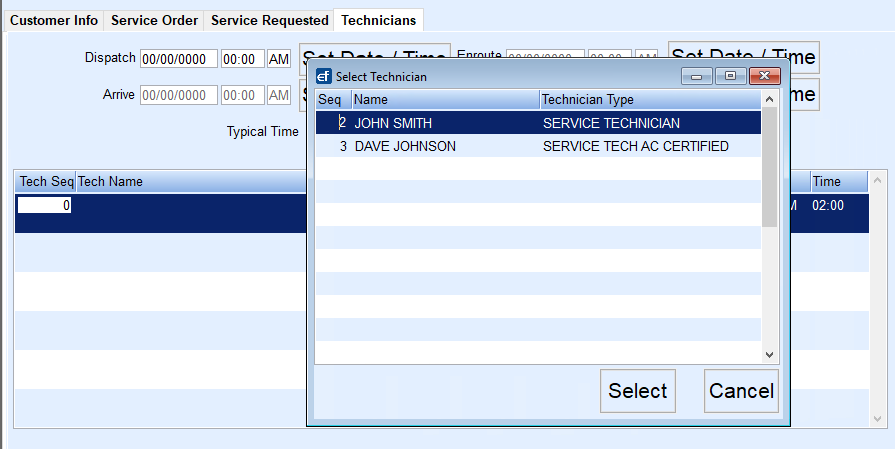
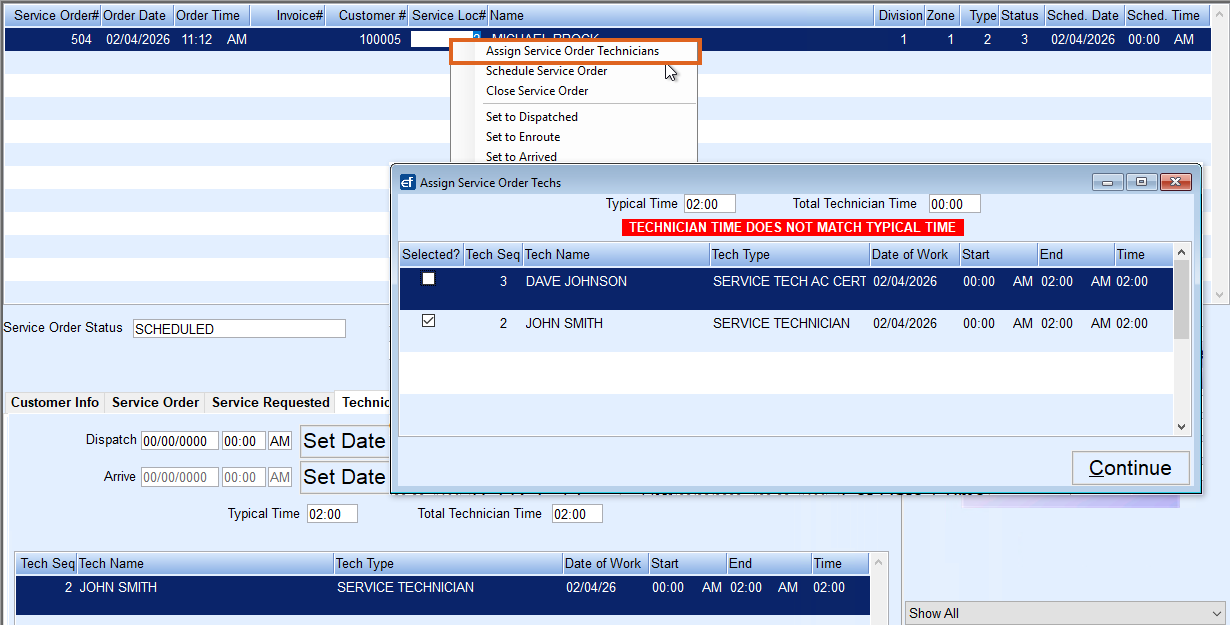
- To assign multiple technicians by a group, right-click on the Location Number at the top of the screen and select Assign Service Order Technician. Checkmark all who apply and select Continue.
- In the Technician Seq field, press F5 and select the Technician to assign to the job. If more than one Technician is assigned to the job, arrow down and press F5 to select again.
- Choose Save when all technicians have been assigned to commit the Service Order to the customer account.


