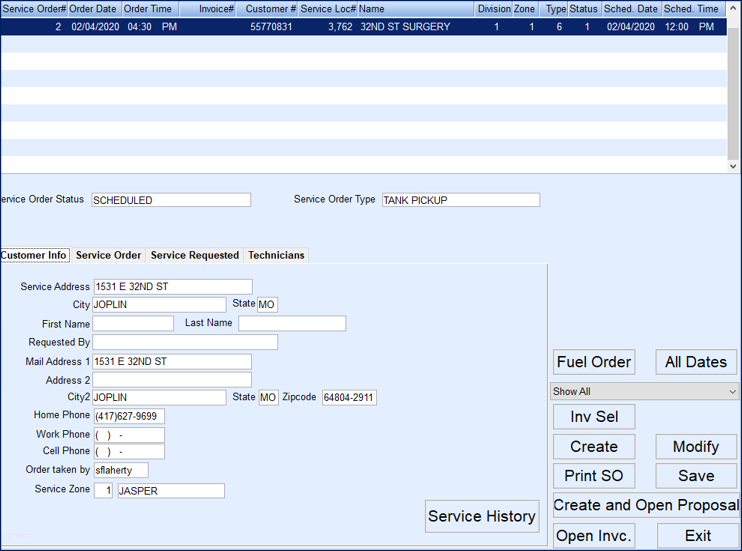
- Highlight the Service Call in the upper section of the Scheduled Call In screen.
- Select Service Order. The Service Order will display.

- Service Order Status and Service Order Types are listed in the center of the screen. Select the Service Requested tab for work details.

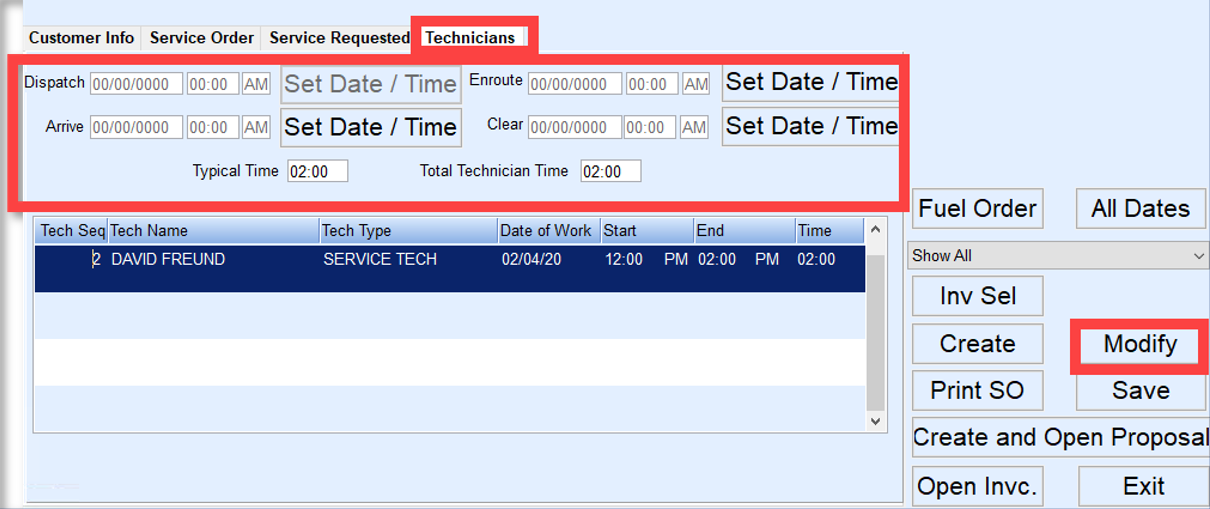
- The Technicians tab indicates the technician assigned to perform the Work Order. Select Modify and make the following settings as work is performed:

- Dispatch – This is typically set by an office staff member and not the service technician.
- Enroute – While in Modify mode, select Set Date / Time when beginning to drive to the service location.
- Arrive – While in Modify mode, select Set Date / Time upon arriving at the service location.
- Clear – While in Modify mode, select Set Date / Time once the job has been completed.
- Total Technician Time will auto populate based on Arrive and Clear times and is an indicator of the number of hours on-site, which can be used to bill labor.
- Once the work has been performed, update the Service Requested tab to indicate the service performed.
- Select Save when finished.
- If the customer is to be invoiced for parts and labor, select the Open Invc. button and choose Create.
- The upper section of the Invoice screen will be populated with the Bill To Name/Address and Service Name/Address information.

- Double tap in the Item field. The Inventory Selection screen will appear.

- Search for the items to be billed and check items as they are to be billed.
- Items will display in lower section under Selected Items in descending order so the technician can always see the last few items added.
- Choose Save Selections. This will navigate back to the Invoice screen.
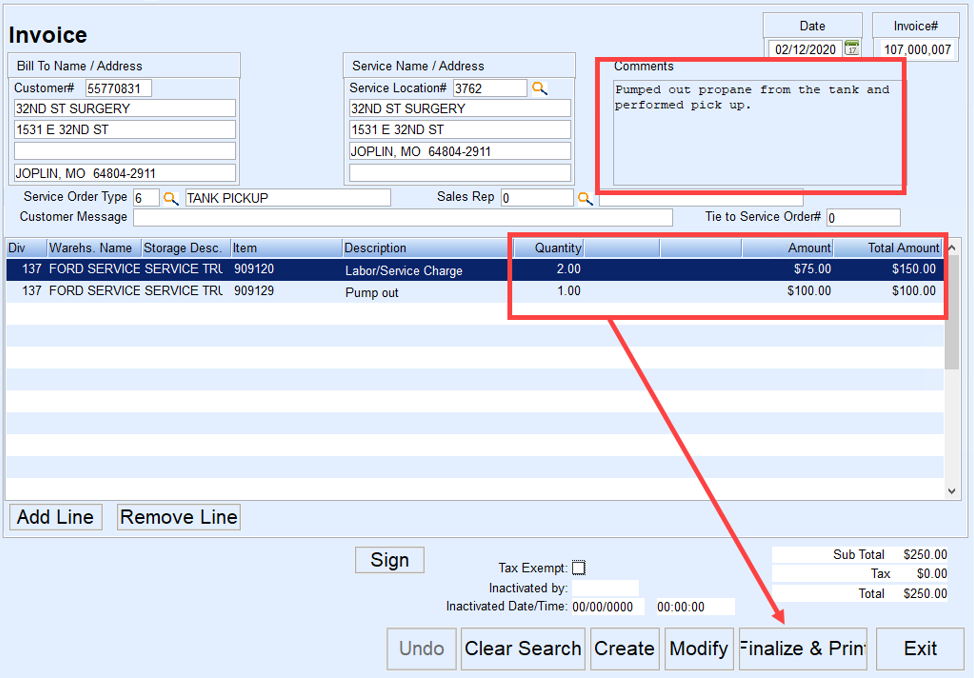
- Selected items will appear on the Invoice in the order they were chosen. Modify the Quantity and/or Amounts as necessary.

- Add any Comments if desired. This will print on the customer Invoice.
- Select Finalize & Print when finished. This will finalize the Invoice and bill the customer.
- Select Exit to not bill the customer.
- The Invoice will communicate to the office allowing an office staff member to finalize the billing as necessary.
- Select Yes to close and print the Invoice.
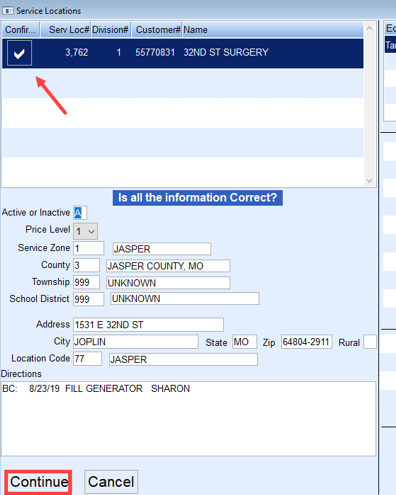
- Checkmark the Confirmation column to confirm the Service Location and select Continue.

- Choose the number of Invoices to print. If the customer requires a signature be present on the Invoice, enter the signature on the tablet and select Continue to print the Invoice.
- Select the Technician tab on the Service Order screen and select Set Date/Time next to the Clear field. Choose Yes to clear the Service Order.
- Confirm the Service Location and select Continue. The Service Order will close and the list of Scheduled Service Calls will display. Repeat steps as necessary to complete all scheduled service work.


