- From the Posting Menu, select Void Line Item.
- On the Please Select a Void Journal Number window, choose Create.
- Enter the Division.
- Enter the Date of the tickets.
- Enter the User ID.
- Choose Select.
- On the Select Customer window, enter the Customer # or press F5 to select from the list.
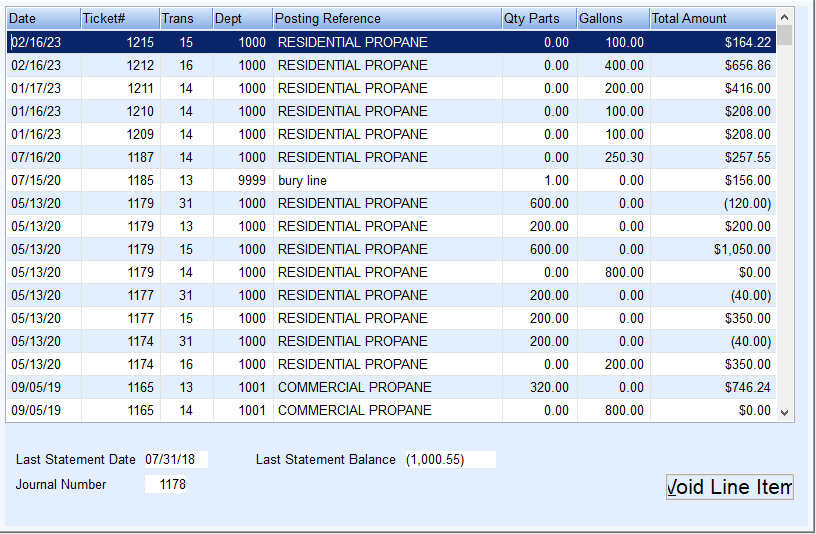
- On the History Line Items window, select the history item to void.
- Choose Void Line Item.
- Wait while the system updates files.
- Repeat Steps 8 - 11 until all items have been voided.
- Close the Select Customer window.

Voiding NMI Transactions
Note: Only Available in version 17.284 or after.
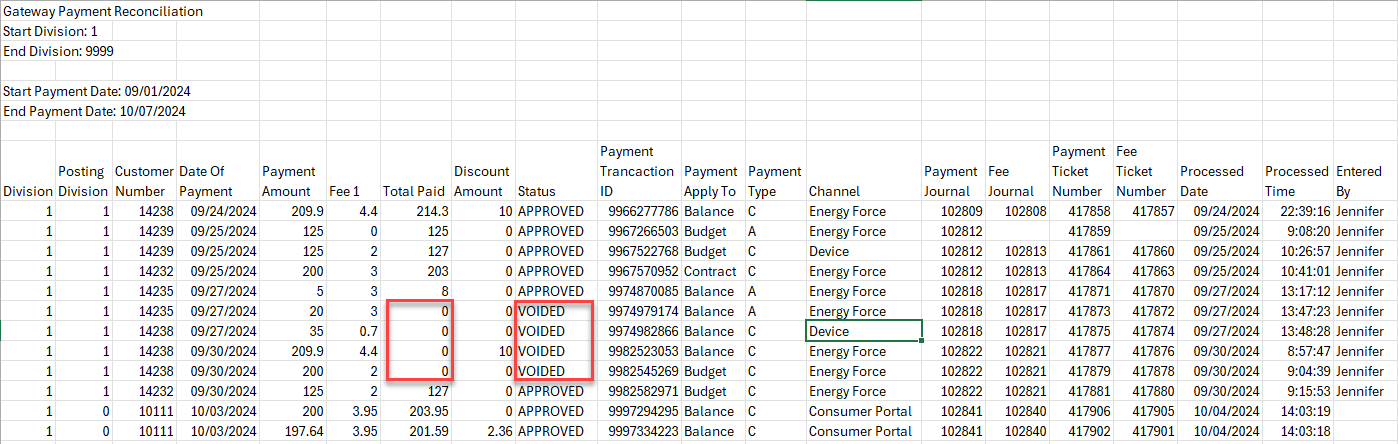
NMI Credit Card and ACH payments voided in Energy Force now communicates back to NMI. If the original payment is still pending (not settled) the transaction will be voided in NMI or if the payment was already settled then a refund will be issued. When the payment is voided in Energy Force, the user receives a message stating Successfully Processed Void in Merchant Portal. If the void couldn’t reach NMI the user will be notified to log into NMI. The void is also reflected on the Gateway Payment Reconciliation report located on the Posting Menu by displaying the Total Paid as 0 and the Status as Voided.
Notes
- VERY IMPORTANT: A ticket cannot be voided from a previous month if statements have been processed and updated to the customer file. This will throw the accounts receivables out of balance. A credit/debit must be issued and the customer ticket reposted. If using the Change Posting Date selection from the Supervisor Menu, only history posted after the date in the file will appear.
- When entering sales and payments, posting is live. If an incorrect entry is made, it has to be voided to reset the customer, tank, meter, and history files to their original values. Void the incorrect transaction before re-entering it. If using the Change Posting Date selection from the Supervisor Menu, only history posted after the date in the file will appear. After voids have been entered, print the void journal for balancing.
- After voiding a ticket, select a new Sales/Payment journal to repost the ticket if applicable. By using a new journal, a completely new audit trail is created.
- If voiding a meter billing, process the correction billing on a different date than the original billing.