Initiating an Integrated Payment
Payments can be made in two locations within Energy Force.
Note: Private user permission is required.
Payment from Posting Menu
Navigate to Main Menu / Posting Menu / Make Portal Payment. Select the Division and Customer Number for the remaining fields to populate.

Payment from Customer Maintenance Screen
Navigate to Main Menu / Customer Menu / Customer Maintenance. Selecting the Pay button to the right of the Last Payment Date at Customer Maintenance, the customers information will populate in the Payment Transaction screen.

Payment Transaction Window
- On the Payment Transaction window select the appropriate Payment Apply To option to apply the payment to.
Note: Budget and Contract sections are for informational purposes.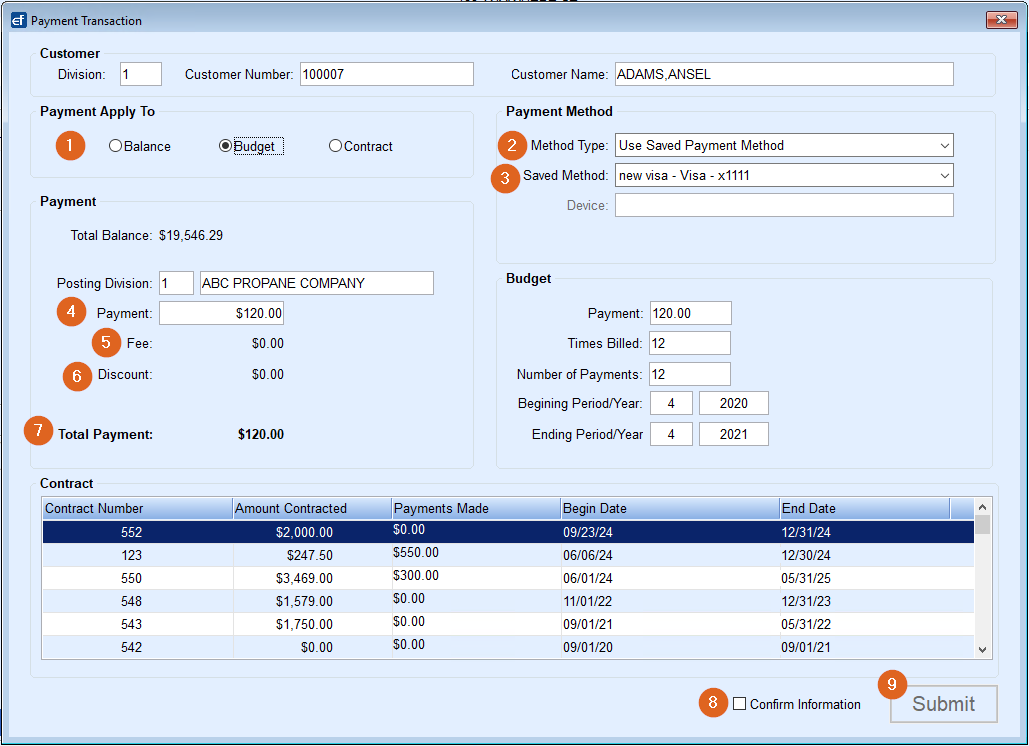
- Budget Payment – If the customer has an active budget then Budget will be preselected, and the Budget Payment amount will be in the Payment field. The transaction will update the Number of Payments for the customer’s budget.

- Balance Payment – Total balance on account will populate as the Payment amount.
- Contract Payment – No amount auto populates; transaction will update an existing active contract for Payments Made.
- Budget Payment – If the customer has an active budget then Budget will be preselected, and the Budget Payment amount will be in the Payment field. The transaction will update the Number of Payments for the customer’s budget.
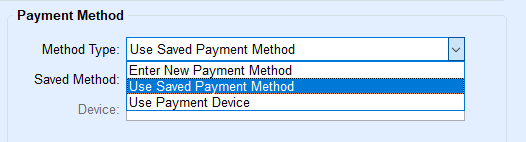
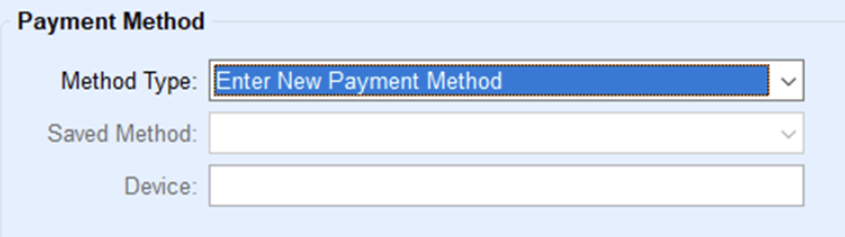
- Choose the Method Type in the Payment Method area. If the customer has a saved payment method, Use Saved Payment Method displays in the Method Type field. Additional options include Enter a New Payment Method or Use Payment Device by selecting the drop-down arrow.
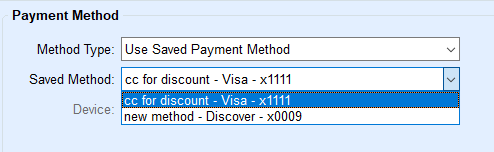
- The Saved Method field displays the default saved payment method when using Use Saved Payment Method. Other Saved Payment Methods can be selected using the drop-down arrow.
- Payment section is populated based on Payment Apply To selection. For non-budget customers, the balance will populate into the Payment field and for budget customers the budget payment amount will populate. The Payment field amount can be changed, however, it might affect the Discount being applicable.
- A fee amount, if any, is shown on the Fee line. Fees will update based on the EF Portal XRef Setup relationship for Department, Payment Type, Payment Apply To, and Fee Amount/Department.
- A discount amount, if any, is displayed on the Discount line.
- The Total Payment amount = Payment + Fee – Discount. This is the amount that will be processed.
- Check the Confirm Information box.
- Select Submit.


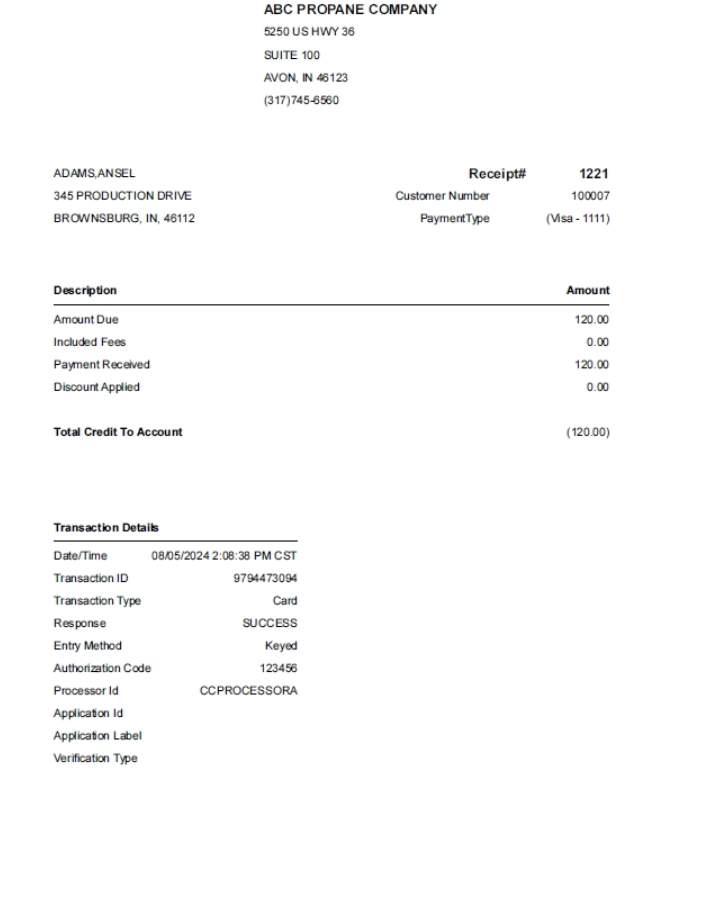
Once customer completes the transaction, Energy Force will display a Payment Status message based on the processing results and prompt to print a receipt for the customer.
 Selecting No will return to the Payment Transaction window. Selecting Yes allows for printing the receipt for the customer and automatically closes the Payment Transaction window.
Payment Using Saved Card or ACH Method
Saving a Payment Method
Payment Methods can be saved when processing a payment or set up ahead of time.
Note: The following steps are specific to adding a new payment method without processing a payment.
The Payment Methods button is located below the Meter/RTM button on the Customer Maintenance screen.

To see other saved methods select the drop-down for Saved Methods. Choose Add to enter a new payment method.

The Billing Address populates from the customer’s record. Update the address to match the Billing Address of the payment being entered.

- Select Payment Type dropdown to choose the appropriate payment type, Credit Card or ACH.
- This payment type can be saved for future use by checking the Save Payment Method box and entering a Payment Nickname for this method.
- Optionally check the Set as default box.
- Check the box next to Confirm information and proceed to payment method entry to display the fields for Credit Card or ACH.
Note: There is a short delay before the fields appear. - Enter the Credit Card or ACH information in the fields.
- Select Submit.
When the submission is complete, a confirmation message displays stating the payment method was added successfully.
Payment Methods can also be removed by selecting the Delete button. The Delete functionality is only available when then is more than one saved Payment Method.
Add a Payment Method and Process a Payment
To add a new Payment Method and process a payment at the same time, select Pay on the Customer Maintenance screen or Make Portal Payment on the Posting Menu. Then from the Payment Transaction window select Enter New Payment Method and the Next button.

- Select the Payment Type – Credit Card or ACH.
- Check the Save Payment Method box.
- Enter a Payment Nickname.
- When saving a new payment method from within Energy Force if | (pipe) special character is used it will be replaced it with a - (hyphen) upon saving.
Example: My|New|Card would save to NMI as My-New-Card.
- When saving a new payment method from within Energy Force if | (pipe) special character is used it will be replaced it with a - (hyphen) upon saving.
- Check the Set as default box if this method is going to be the customer default payment method.
- Check the box to Confirm information and proceed to payment method entry. Once checked, the fields for Credit Card or ACH information will display.
- Enter the Credit Card or ACH information in the fields.
- Select Submit. The payment method will be saved, and the payment will be processed.
The choice to print a receipt will come up after the payment is approved
Note: Creating a saved payment method within Energy Force will auto-create the NMI vault record and account association for accounts that do not already have a vault record. This allows users to save the initial payment method without going to NMI first.
Device Payments
Processing a Device Payment
Device payments can be made from the Pay button on the Customer's Account or from the Make Portal Payment on the Posting Menu.![]()
- Select Balance, Budget or Contract in the Payment Apply To section. If the customer has a Budget, it will be preselected, and the Budget amount will be populated into the Payment field.
- Select Use Payment Device for Method Type.
- Select the Device.
Note: If there is a default Device set for the user processing the payment it will display automatically and can be changed if necessary. When there is no default Device set, a Device can be selected from the Select - Payment Device window. When selecting the Device from the list optionally check Set selected as default device and choose Select.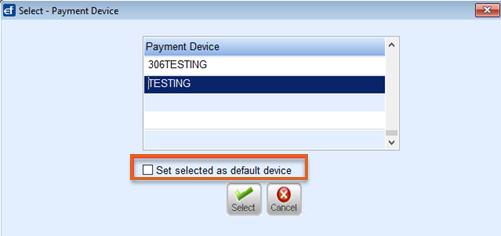
- Check the box to Confirm Information.
- Choose Submit to send payment to the device.

Complete the transaction on the device. Once complete, a payment status box will display in Energy Force. If the status is approved there is an option to print a receipt.
Device payments will post to a payment journal with the Division\Location set in Payment Device Management.
Cancel Payment on Device
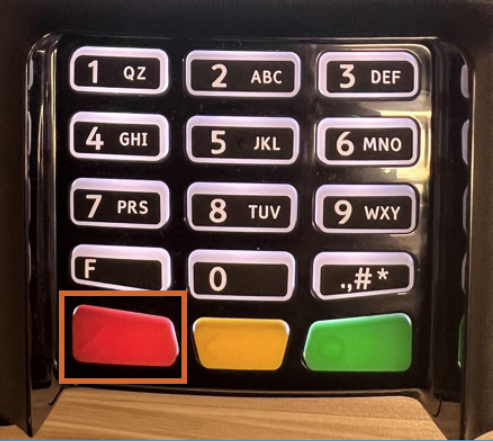
- If incorrect payment amount is sent to the device, press the red X (cancel) button on the device. After Energy Force receives the cancellation request, the correct amount can be resent to the device following the directions above.

Voiding NMI Transactions
Note: Only Available in version 17.284 or after.
NMI Credit Card and ACH payments voided in Energy Force now communicates back to NMI.
- If the original payment is still pending (not settled) the transaction will be voided in NMI or if the payment was already settled then a refund will be issued.
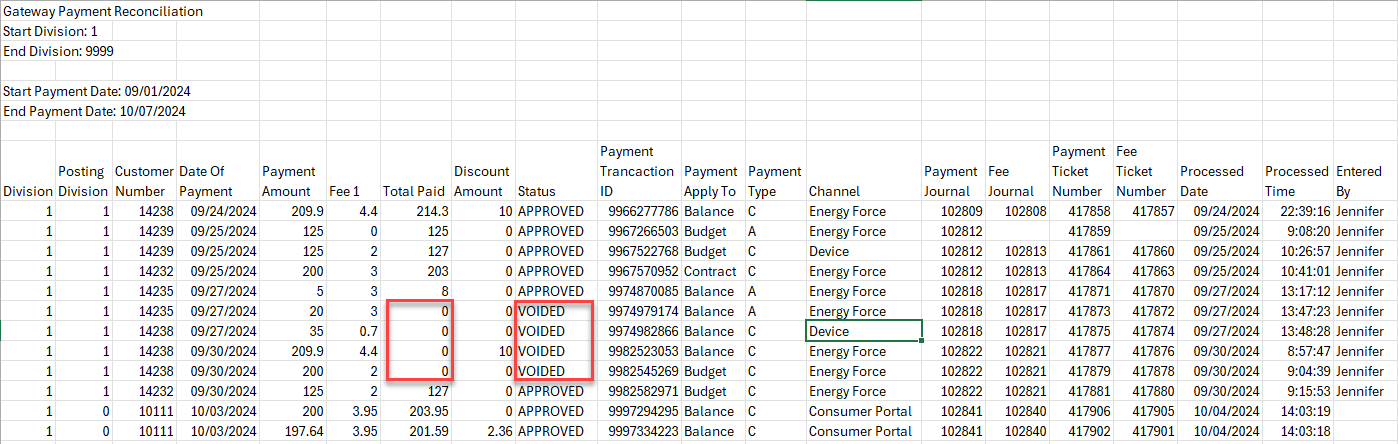
- When the payment is voided in Energy Force, the user receives a message stating Successfully Processed Void in Merchant Portal. If the void couldn’t reach NMI the user will be notified to log into NMI. The void is also reflected on the Gateway Payment Reconciliation report located on the Posting Menu by displaying the Total Paid as 0 and the Status as Voided.
- When voiding a Payment Integration payment in Energy Force, all applicable fees and discounts will also be voided. When the Void Line item is selected, a message alerts that the payment, applicable fees, and discounts will all be voided. Choose Cancel to return to the list or OK to process the void.
Note: This new functionality will only work on payments processed after this release.
