A template can be defined in the Division file which will help to facilitate a tank setup in a timely manner. Most of the information will be auto-filled leaving a minimum amount of data to enter.
- Under the Division Setup screen, select Define Template. This will open Customer Template Wizard that walks through step-by-step how to set up the tank.
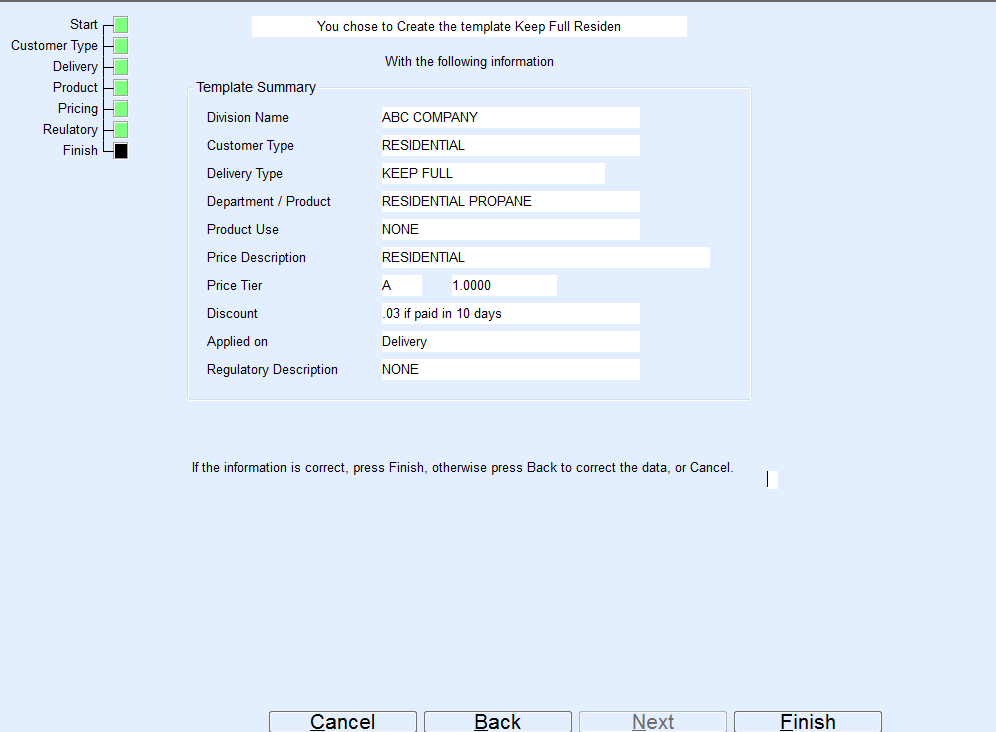
- Select the operation to perform under the Select your choice drop-down: Create New Template, Modify Existing Template, Copy Template, or Delete Template. When creating a new template, the red blocks on the left side of the screen will turn green when completed with that section. If an item is missing, it will turn yellow (Yellow may also display if a product usage or a regulatory fee has not been applied. This is normal).
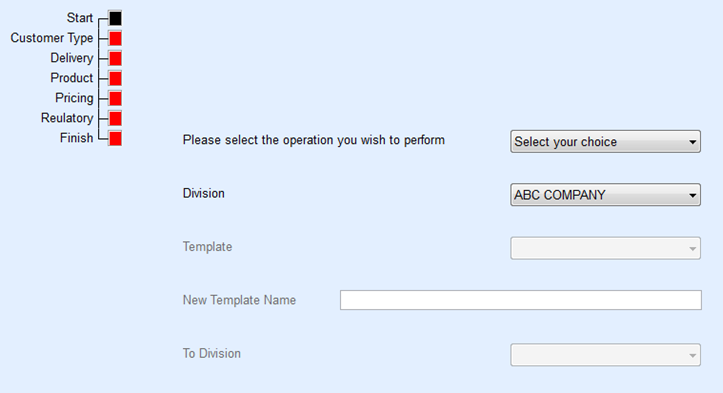
- Select the Division and enter the New Template Name. Select Next. This will navigate to the next section of the Wizard. Answer all questions accordingly and select Next until finished.
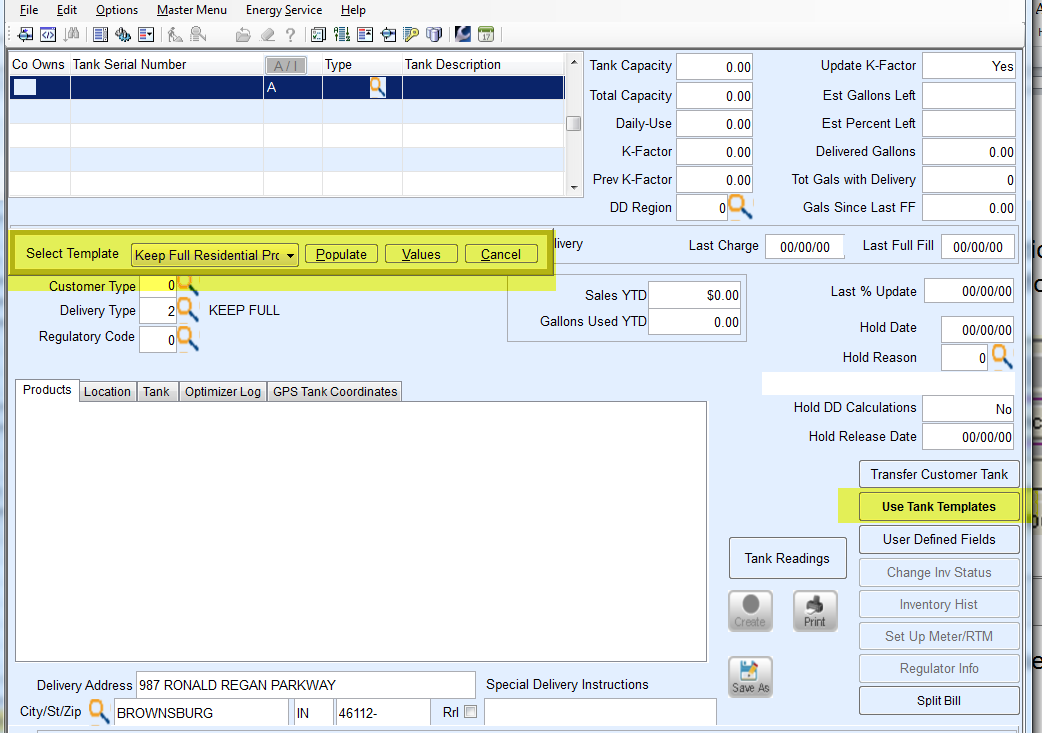
- Once the templates are complete, select Use Tank Templates on the Tank screen.
- Select the Template.
- Choose Populate. This will input all of the Wizard information automatically.
- Continue to enter all required information (serial number, location information, product information) and select Save when finished.