Billing Entry
- Go to Main Menu / Posting Menu / Recurring Billing Menu / Billing Entry.
- Select Create or Ctrl+C on the keyboard.
- Select the Search icon or press F5 to select the Division, Customer #/Name, and Cycle Code.
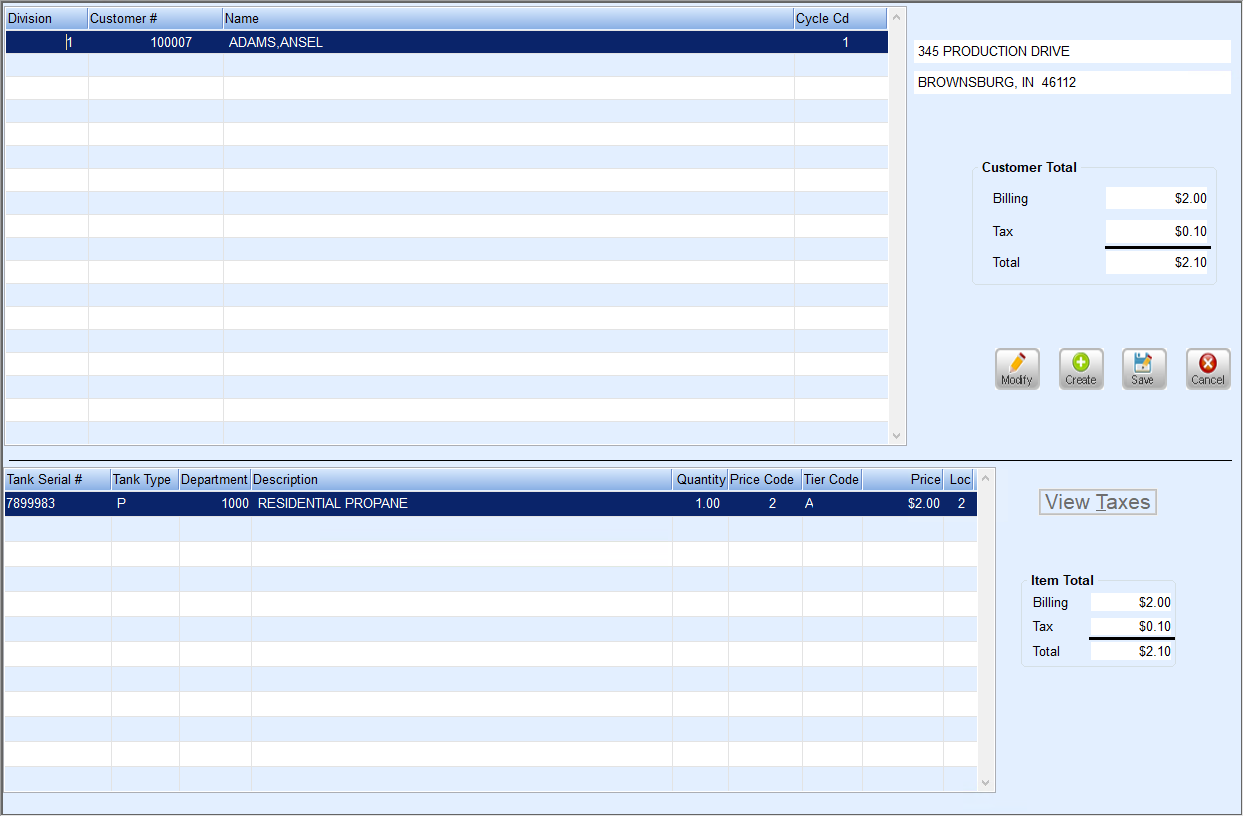
- The Tank Serial # will default if the customer only has one tank. If the customer has multiple tanks, select the appropriate tank from the list that displays.
- Choose the Search icon or press F5 to select the Department. Enter the Quantity and choose on the Search icon to select the Price Code and Tier Code.
- Review the Billing and Tax information to verify the information is correct.
- Select Save.
- Choose Create to add each customer that will be assessed a Recurring Billing Fee.
- Once saved, a list of customers entered will display. If a customer was set up in error, highlight the customer and press the Delete button or F3 on the keyboard.

Billing Customer List
It is best practice to print the Billing Customer List before processing recurring billing files. This gives the ability to review the customers per Division and Cycle Codes to ensure the Billing Entry file is accurate.
- Go to Main Menu / Posting Menu / Recurring Billing Menu / Billing Customer List.
- Enter the Division and Cycle Code and then select Process.
- Select the Printer to print.
- Review for accuracy. If changes need to be made, return to the Billing Entry screen and edit as necessary.
Process Recurring Billing
- Navigate to Main Menu / Posting Menu / Recurring Billing Menu / Process Recurring Billing.
- Select Create or press Ctrl+C on the keyboard.
- Enter a Description for what will be processed.

- Enter a unique File Name.
- In the Process as of Date field, enter the date on which the recurring charges should be applied.
- Enter the Division to process. Enter 0 to process all Divisions.
- In the Cycle Code area, enter the Cycle Code to process. Enter 0 to process all Cycle Codes.
- Press Ctrl+Q to save the setup. Once saved, Populate Recurring Billing will highlight. Delete Recurring File will be highlighted as well. (If the wrong parameters were entered in the file setup, highlight the file name and select Delete Recurring File.)
- Choose Populate Recurring Billing. This will populate the Billing File with all customers that were entered into the Billing Entry program with the same Cycle Code and Division. The View/Edit and Print Recurring Billing buttons will highlight when the program is finished running.
- Select View/Edit Billing File to review billing information or to print the billing report for review. (It is not required to print the report but may be beneficial to keep for with records.) Delete customers from the View/Edit billing file by pressing Ctrl+M on the keyboard and then pressing F3. The amount of the billing cannot be edited. Press ESC on the keyboard when finished editing.
- Once editing is completed, select Post Recurring Billing. Enter the Division to post to and select Process. This will update the customer account file, sales history, and create a posting journal in the Sales Entry menu.
