Enter Work Order on Existing Customer
- From the Master Menu, select Work Orders or, on any window, press CTRL+S.
- From the Work Order Menu, choose Work Order Entry.
- On the Work Order Entry window, press CTRL+C.
- On the Select - Customer window, select the customer to enter the Work Order for and choose Select. If a customer number does not exist, press Tab.
- In the Customer # field, press Tab.
- If the customer has more than one tank, select the tank the Work Order is for on the Select - Tank/Customer window and choose Select.
- The First Name, Last Name, Name, and Divisions will update automatically. Press Tab through these fields.
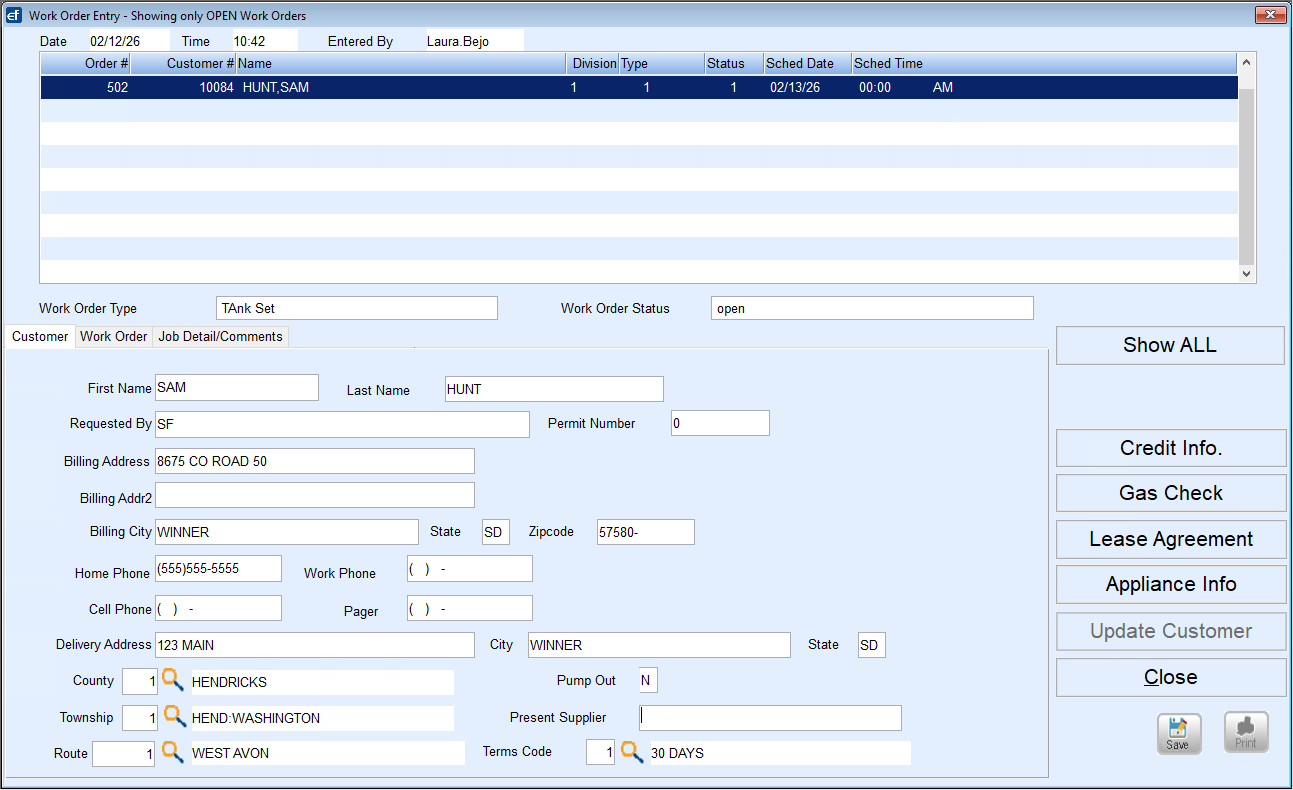
- In the Type field, enter the code for the type of work that will be performed or press F5 to select the Work Order Type from the list.
- In the Status field, enter the Status Code for the Work Order.
- If the work has been scheduled, enter the scheduled date in the Sched Date field. If the work has not been scheduled, press Tab.
- If the work has been scheduled, enter the scheduled time in the Sched Time field. If the work has not been scheduled, press Tab. In the next field, enter A for AM or P for PM.
- Enter who requested the work in the Requested By field.
- Enter the Permit Number.
- The Billing Address, Phone Numbers, Delivery Address, County, Township, and Route fields will update automatically. Press Tab through these fields.
- In the Pump Out box, enter Y if there will be a pump out or N if there will not be a pump out.
- Enter the Present Supplier.
- The Terms Code field will update automatically. Press Tab.
- On the Work Order tab, the tank and meter information will update automatically. Press Tab through these fields.
- In the Service team field, enter the Service Team Code or press F5 to select the Service Team from the list.
- Press Tab in the Close Date field.
- Press Tab in the Hrs on Job field.
- The Directions field will update automatically. Press Tab.
- On the Job Detail/Comments tab, enter the work that has been requested in the Work Requested field.
- Enter the work that has been performed or any additional information about the work in the Work Performed area.
- Enter any additional Comments about the Work Order or customer.
- Select Save.

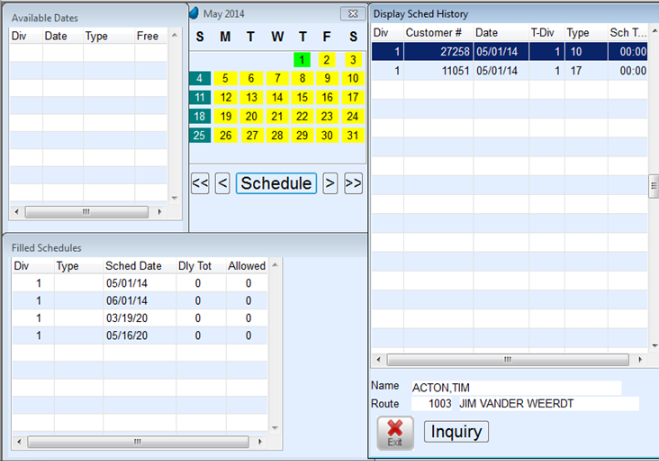
Choose the Search icon (or press F5 or double-click) for scheduling from the Work Order Schedule Date to see what days are available.
The following cross reference table must be built to utilize Work Orders and Calendar Scheduling.

From Calendar Scheduling
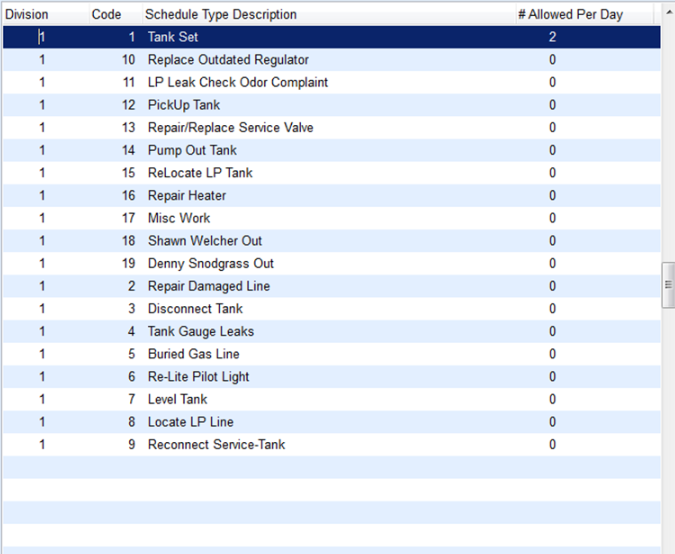
From Work Order Type
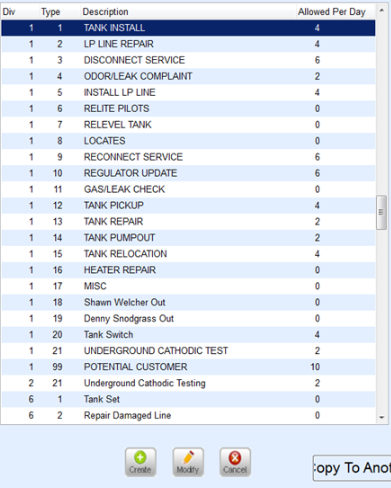
After the cross referencing is done between Calendar Scheduling and Work Orders, start scheduling by pressing F5 while in the Date field on the Work Order screen.