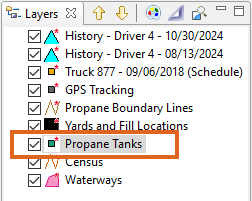
- Select the appropriate Tank Layer located on the Layers tab (Propane or Other Non-Propane Tanks).
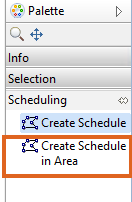
- Select Scheduling on the Palette.

- Choose Create Schedule then click on the map. This will activate Scheduling mode.
- Alternatively, choose Create Schedule in Area to allows for drawing a boundary area around tanks for scheduling, right-click to remove an unwanted boundary if an incorrect location is chosen, then hold Shift and double click to finalize.
- Based on the Fuel Types specified for the selected truck, matching tanks that are eligible for a delivery (based on filtering options in Settings) are scheduled starting at the yard for that route and going to the nearest tank. Continuing on with the next closest tank and refilling at the yard when needed. This continues until all eligible tanks are scheduled or the max number of runs is reached. The Finalize Schedule dialog box is presented to the user for confirmation.
- Alternatively, choose Create Schedule in Area to allows for drawing a boundary area around tanks for scheduling, right-click to remove an unwanted boundary if an incorrect location is chosen, then hold Shift and double click to finalize.
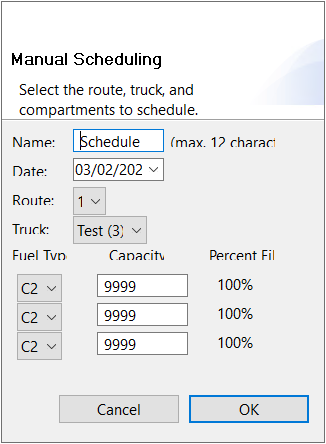
- Select anywhere on the map. The Manual Schedule feature will display.
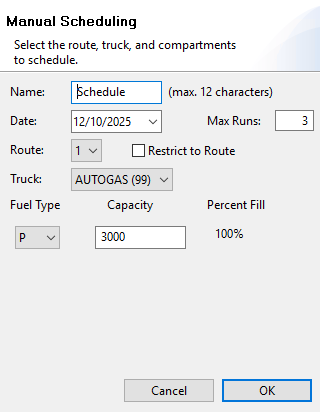
- Fill out the information for Name, Date, and Route.
- Select the Truck. If a refined fuel truck is chosen, Fuel Types will need to be specified for each compartment.
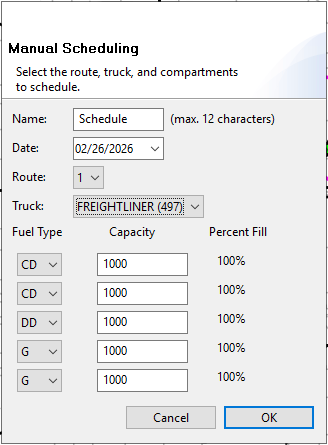
- Select OK.
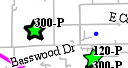
- Review the tanks on the map pertaining to the route. The tank symbol will be present with the estimated number of gallons to deliver to fill the tank to 80%.
- Begin by choosing tanks needing routed. The Tank Details panel will display. This allows the customer account and tank to be reviewed prior to being scheduled. Select Schedule to add to the schedule or Cancel to choose a different tank.
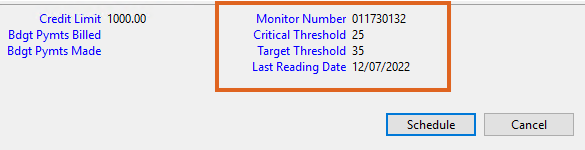
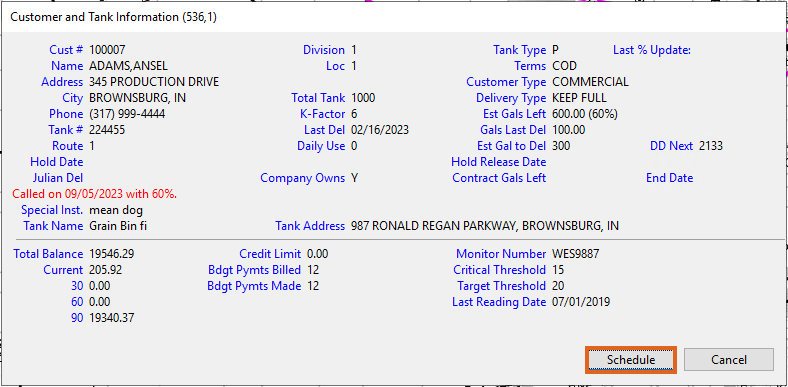 Monitor information also displays in the special information box dialog box if applicable.
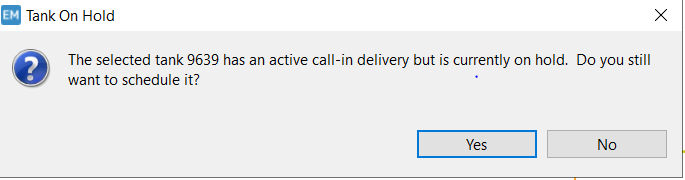
 Note: Tanks on Hold with an active call in can be scheduled on the Energy Map with a a message that alerts the tank is on hold.
- As tanks are scheduled, gallon values remaining on the truck will appear in the lower left corner of the screen. If gallons are exceeded, a message will appear to warn the dispatcher but will not prevent the tank from being scheduled.

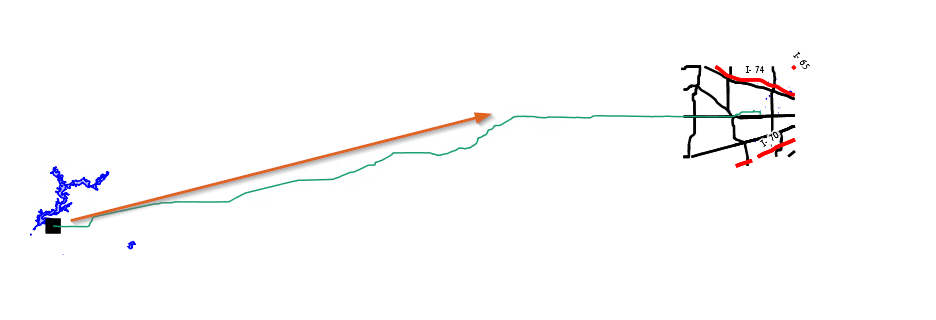
- Additionally, a route line will appear from the designated yard assigned to the route. This route line will continue to draw as each tank is scheduled.
- If more than one tank is present when selected, the Select Object screen will appear. Highlight and choose the tank.
- When the route is complete, there are two options:
- Option 1: Finalize the Route
- Press Shift and double-click anywhere on the screen to finalize the route.
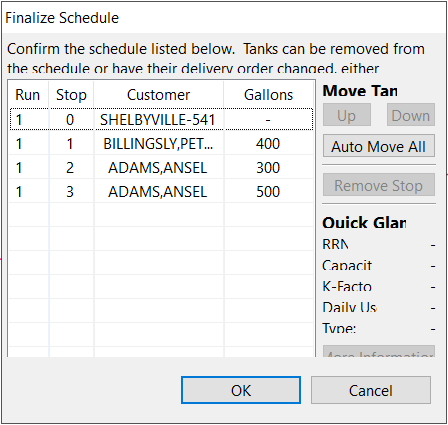
- The Finalize Schedule screen will appear.

- Modify the route as necessary by changing or removing a stop.
- Select OK when finished. This will add the Schedule to the Layers tab.
- Select Commit Route Layer on the toolbar to save.
- Option 2: Add Another Run to the Route
- Select the storage yard the driver will use when refilling the truck. This will be the starting point for Run 2.
- The Manual Scheduling screen will appear once more to refill the truck and start new. There will not be an option to choose another route or truck.
- Option 1: Finalize the Route
- Continue to schedule tanks and generate runs as necessary.
Note: Schedules will only be saved back to Energy Force if created in the current session. This prevents tanks being rewritten to Print Map Scheduling after they have been removed. - Press Shift and double-click to finalize and select OK when all necessary modifications have been made.
- This will save the route schedule to the Layers tab.
- Select Commit Layer Changes to save to the Energy Force Print Map Scheduling screen.
- Select any Palette feature or layer to exit scheduling.


 Monitor information also displays in the special information box dialog box if applicable.
 Note: Tanks on Hold with an active call in can be scheduled on the Energy Map with a a message that alerts the tank is on hold.


Notes:
- When moving data from the local app folder to ProgramData, all users are granted full rights to the Maps folder and files. If a previous version was deployed that moved the data ( 1.4.8.2 or 1.4.8.3), and users do not have inherent admin or full rights, the company's IT will need to grant rights to the folder manually to avoid having issues writing to the files.
- Additional information is logged for fuel type errors to include the Truck Number/Name along with added logging for the Area Scheduling Tool for trouble shooting if error that I is an invalid or unknown fuel type is received.
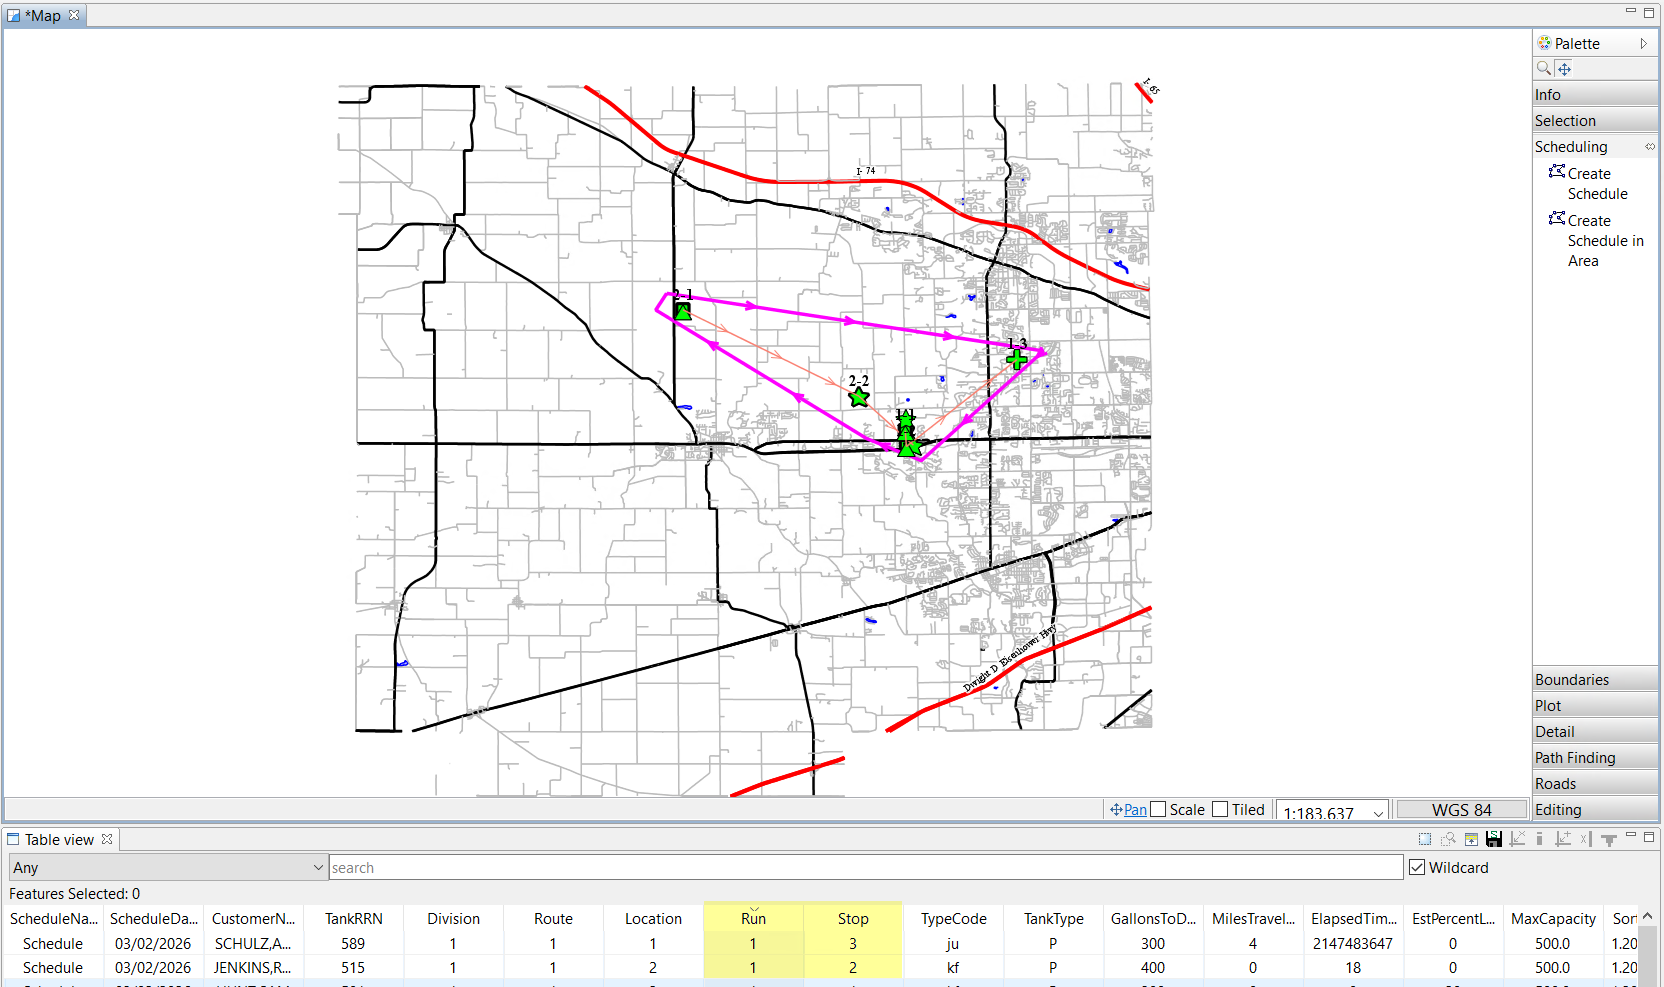
View a Schedule on the Map
- Select the schedule layer.
- This will prompt the Table View to display the route along with detailed information.
- The map will display the route and indicate the Run number and sequence number.