Cylinder Exchange Setup Tables
Maintenance Table Setup:
The first section of this document pertains to setting up maintenance tables in order to properly utilize the Cylinder Exchange feature in Energy Force and EnergyTrack.
Tank Types
Begin by determining the cylinder tank types that will be tracked by Energy Force. It is suggested to add a Tank Type for each cylinder size for inventory tracking purposes.
Example: Main Menu\Supervisor\Maintenance Menu\Maintenance Tables\Tank Type

20# Cylinder =C2 33# Cylinder = C3 40# Cylinder = C4
Each cylinder Tank Type needs to indicate No for Tank Assoc? and to Track By Cylinder. This tells the system to treat it as an exchange cylinder, rather than a cylinder fill.
Add Cylinder Departments
Departments will need to be added to the Department table to indicate a Cylinder Tank Type and flagged Global to send to EnergyTrack.

- Indicate the appropriate Tank Type code to coincide with the Department Description added.
- Gas Dept will need to be set to Y to function properly with EnergyTrack.
- Gallons will not be physically pumped by the truck; therefore, the Posting Transaction Code will be 13 to charge the customer account.
- Make sure to apply the Department code to Division 1 along with any other location that may perform cylinder exchanges.
Price Table
Price codes and Tiers will need to be established in the Price Table for each cylinder type that is to be exchanged. The Price Code must exist in Division 1 along with any other locations that may utilize cylinder exchanges.

Add Cylinders to Tank and Meter Inventory
Add company owned cylinders to the Tank and Meter Inventory screen for tracking purposes at Main Menu\Tank and Meter Inventory\Tank & Meter Maintenance.
- Add each cylinder Tank Type to the Inventory screen.
- Input the Tank Capacity as 1 (This is a required field, but has no effect on how cylinders are exchanged).
- Indicate the overall total of Company-Owned cylinders in the Total Cyl Quantity field.
- Indicate the total number of cylinders that are currently in the warehouse in the Total Cyl in WH field.
- As cylinders are applied to customer accounts, the number of total cylinders in the warehouse will be reduced.
- When cylinder tanks are picked up from a customer account utilizing the Change Inventory feature in the Tank screen, the cylinders will be added back into the overall Total Cyl in WH count.
Add Cylinder Trucks to Truck Maintenance Tables
If performing cylinder exchanges with EnergyTrack, the cylinder exchange trucks will need to be added to the Truck Maintenance Tables at Main Menu\Bulk Truck Delivery\Truck Maintenance.
Each Cylinder Tank Type code will need to be added as a Compartment so they can be loaded with EnergyTrack when starting a shift. If you do not add the Comp Types, the system will not allow you to perform an exchange.
Add Cylinder Tanks to Customer Account
Once maintenance tables have been set up in Energy Force, cylinders can be applied to customer accounts for exchange purposes.
Add Cylinder
- Navigate to the Customer Maintenance Menu and select the customer.
- Select Tank Info.
- Press Ctrl+C to add a tank.
- Enter Yes for Co Owns.
- Search for the cylinder Tank Type (C2, C3, etc).
- Select the cylinder Tank Type to be applied to the customer account. This will return you to the Tank Set-up screen.
- A new tab will now appear next to GPS Coordinates called Cylinder.
- Continue with setting the cylinder up as you normally would for a standard tank, indicating Customer Types, Delivery Types, Products, Pricing and etc.
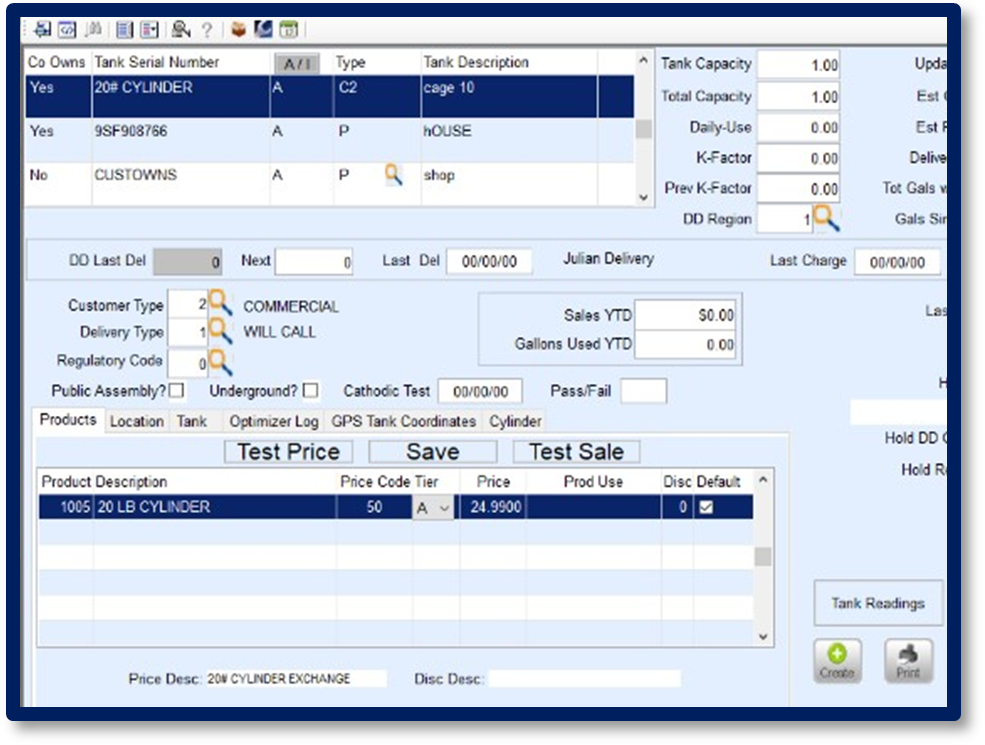
- Select the Cylinder Tab.
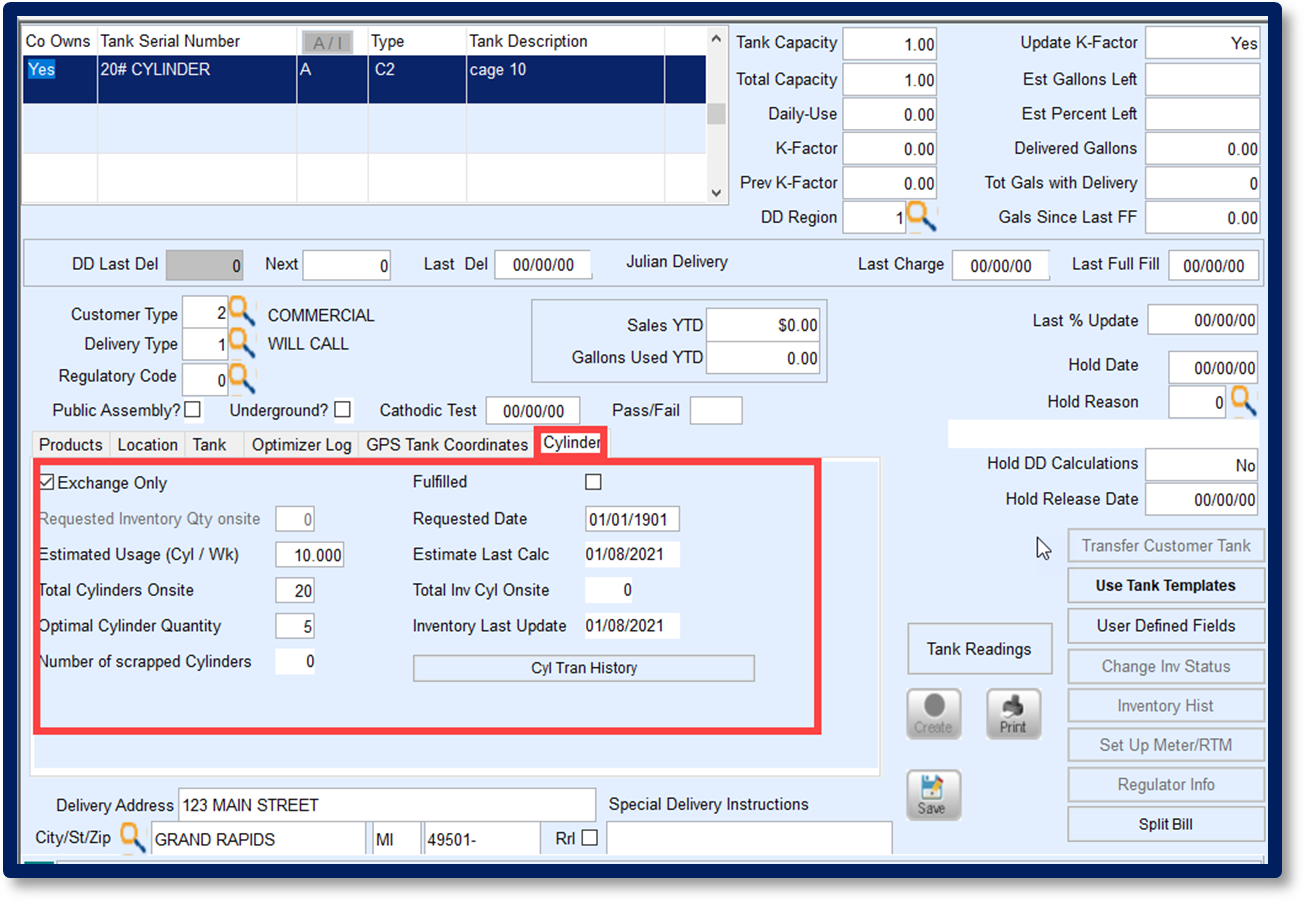
- Select Exchange Only.
- Enter the number of estimated cylinders to be used per week (optional).
- Enter the Total Cylinders to be applied to the site (this will reduce the inventory available in the warehouse for the Tank Type).
- Enter Optimal Cylinder Quantity to keep on-site.
- Select Save. Cylinder exchanges can now be performed in Energy Force and EnergyTrack.


Energy Force Sales Posting
The following section outlines how to post a cylinder exchange in Energy Force. Separate documentation is available for EnergyTrack Cylinder Exchanges and provided to delivery drivers during the training process.
Sales Posting
- Navigate to Main Menu\Posting Menu\Enter Sales.
- Create a Sales Journal indicating Posting Division, Date, and User ID.
- Enter a Ticket number or, press Tab to allow Energy Force to generate an Invoice Number.
- Enter the Customer# number (or F5 to search by name) and press Tab.
- Select the Cylinder Tank to be exchanged.
- If customer has one tank on file it will automatically populate.
- The Department should automatically default based on the product assigned to the Cylinder Tank when added to Energy Force, as will the Transaction Code.
- Tab to the Driver # field and choose the driver.
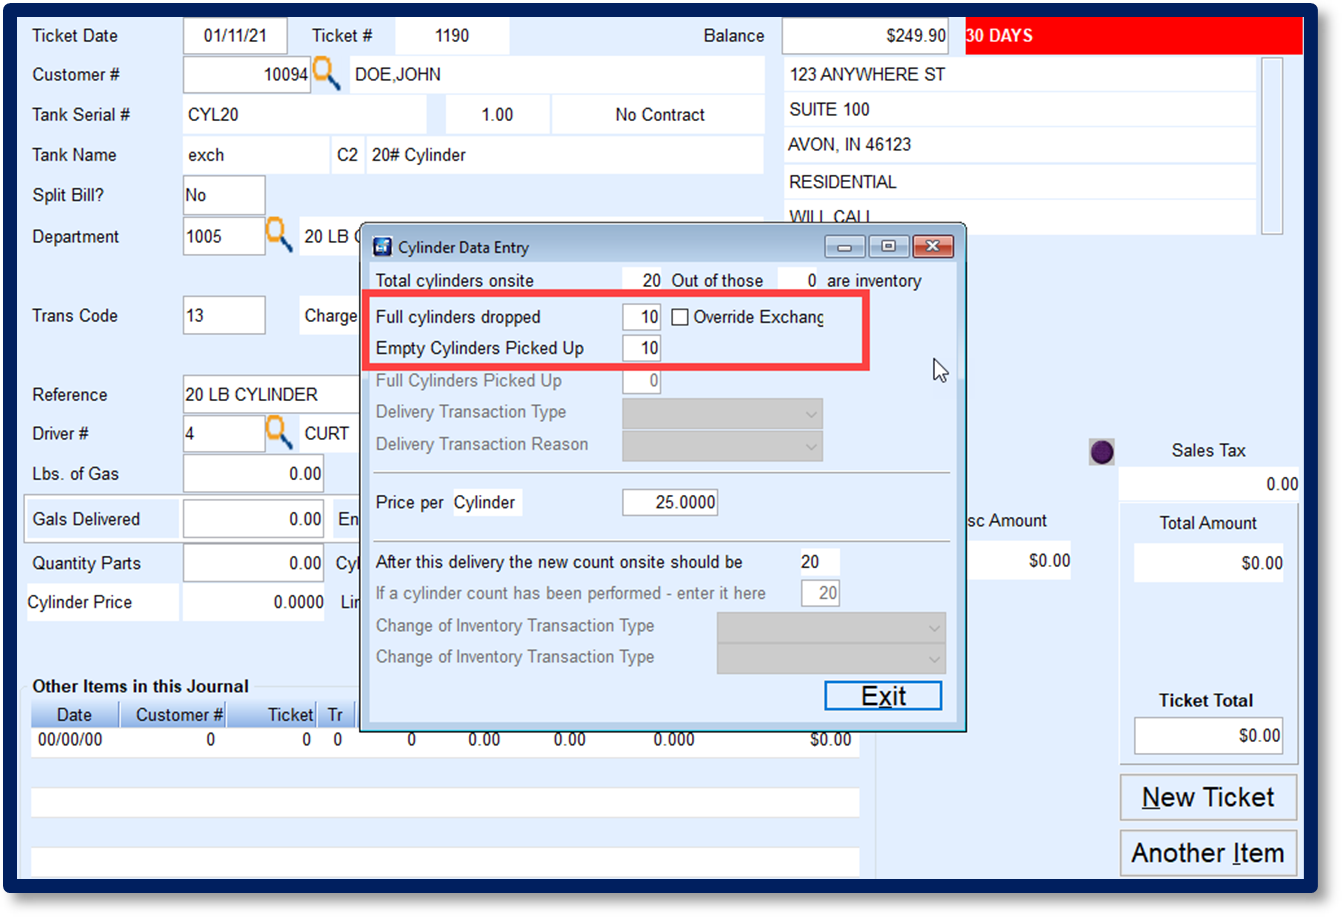
- The Cylinder Data Entry screen will appear. Enter the Full cylinders dropped value.
- If you do not pick up the same number of empty cylinders from the site, select Override Exchange.
- The Empty Cylinders Picked Up field will populate with the same value from Step 8.
- If Override Exchange was chosen, type in the number of Empty Cylinders Picked Up.
- Enter the number of Full Cylinders Picked Up.
- Select the Delivery Transaction Type from the drop-down menu (change in usage, too much inventory, etc.).
- Select the Delivery Transaction Reason (Summer, return to yard, etc).
- The Price Per Cylinder will populate based on the Price Code\Tier assigned to the Customer Tank. Modify if necessary.
- Press Exit to return to the Ticket. The screen will automatically populate based on the information entered in the Cylinder Data Entry screen. Review for accuracy and select New Ticket if finished, or Another Item to add other items to the ticket.
- During this process, the Sales Posting Routine updates the customer account information such as History Inquiry and the Cylinder tab in the Tank Info screen.

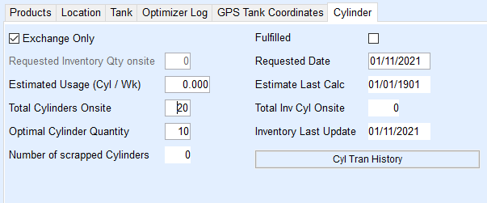
- Requested Date and Inventory Last Update fields will update.
- If a cylinder was picked up as damaged, the Number of scrapped Cylinders will update.
- During this process, the Sales Posting Routine updates the customer account information such as History Inquiry and the Cylinder tab in the Tank Info screen.
- Return to the Journal screen when finished posting to finalize.


